Hi! Today we will see how to resize image and create thumbnail in codeigniter. This comes handy when you want to resize user avatar or profile images. Generally, shopping sites employ this method. Although they upload large product images, they'll create a thumbnail version of them and lists them in several categories. This will not only save bandwidth but load the page faster and listing more items in a limited space. We are going to see how to do this in codeigniter.
CI offers a very useful image manipulation class called image_lib which we are going to use for resizing the image. Using this library you can not only change the size but perform crop, rotate and watermark images. It is compatible with all major image libraries like GD/GD2, ImageMagick and NetPBM and we will use GD2 here.

CodeIgniter - Image Resizing and Creating Thumbnail Image:
Let's build a CI demo to implement image resizing and the process goes like this. The user uploads images using the upload form provided. The image will be uploaded and moved to the 'uploads' folder on the server. And the same will be resized to a thumbnail size image and stored inside the 'thumbnails' folder. We will add the appropriate notification and error handling to the demo.
As for this example, we need to create two files, a codeigniter controller and a view. Follow the below steps to build demo.
Read: How to Create and Delete Session in CodeIgniter
Step-1) Create Folders to Store Images
You need proper folder structure to store the uploaded and resized images. Go to your application root directory and create two folders, 1. 'uploads' and 2. 'thumbnails' inside the 'uploads' folder. Also make sure you have write permission enabled on the folders.
Step-2) Create View
Next create a view file inside 'application' > 'views' folder. This file will contain the image upload form. The form itself is quite basic, a file input and a submit button.
upload_view.php
<!DOCTYPE html>
<html>
<head>
    <meta name="viewport" content="width=device-width, initial-scale=1.0">
    <title>CodeIgniter Image Resize and Thumbnail Creation Demo</title>
    <link href="https://maxcdn.bootstrapcdn.com/bootstrap/3.3.7/css/bootstrap.min.css" type="text/css" rel="stylesheet" />
</head>
<body>
<div class="container">
    <div class="row well" style="background: none;">
        <?php echo form_open_multipart('upload_controller/upload_image');?>
            <legend>Choose Image to Upload</legend>
            <div class="form-group">
                <input type="file" name="imgfile" />
                <span class="text-danger"><?php if (isset($error)) { echo $error; } ?></span>
            </div>
            <div class="form-group">
                <input type="submit" value="Upload Image" class="btn btn-warning btn-lg"/>
            </div>
        <?php echo form_close(); ?>
        <?php if (isset($success)) { echo $success; } ?>
    </div>
    <?php if(isset($filename)) { ?>
    <div class="row text-center well" style="background: none;">
        <h4>Original Image</h4>
        <img src="<?php echo base_url().'uploads/'.$filename; ?>">
    </div>
    <div class="row text-center well" style="background: none;">
        <h4>Thumbnail Image</h4>
        <img src="<?php echo base_url().'uploads/thumbnails/'.$filename; ?>">
    </div>
    <?php } ?>
</div>
</body>
</html>
Step-3) Create Controller
In this step, create a controller file inside the 'application' > 'controllers' folder. This contains three functions, 1. index() which is the default, 2. upload_image() that verifies the submitted image file and uploads it to the server 3. resize_image() that creates a thumbnail of the uploaded image and saves it inside the 'thumbnails' folder.
upload_controller.php
<?php
class upload_controller extends CI_Controller {

    function __construct()
    {
        parent::__construct();
        $this->load->helper(array('form', 'url'));
    }

    // default function
    function index()
    {
        //load file upload form
        $this->load->view('upload_view');
    }

    // image upload function
    function upload_image()
    {
        // upload settings
        $config = array(
            'upload_path' => './uploads/',
            'allowed_types' => 'png|jpg|jpeg|gif',
            'max_size' => '1024'
        );

        // load upload class
        $this->load->library('upload', $config);

        if (!$this->upload->do_upload('imgfile'))
        {
            // case - failure
            $upload_error = array('error' => $this->upload->display_errors());
            $this->load->view('upload_view', $upload_error);
        }
        else
        {
            // case - success
            $upload_data = $this->upload->data();
            $data['filename'] = $upload_data['file_name'];
            $this->resize_image($data['filename']);
            $data['success'] = '<div class="alert alert-success text-center">Image uploaded & resized successfully!</div>';
            $this->load->view('upload_view', $data);
        }
    }

    // image resize function
    function resize_image($filename)
    {
        $img_source = './uploads/' . $filename;
        $img_target = './uploads/thumbnails/';

        // image lib settings
        $config = array(
            'image_library' => 'gd2',
            'source_image' => $img_source,
            'new_image' => $img_target,
            'maintain_ratio' => TRUE,
            'width' => 128,
            'height' => 128
        );

        // load image library
        $this->load->library('image_lib', $config);

        // resize image
        if(!$this->image_lib->resize())
            echo $this->image_lib->display_errors();
        $this->image_lib->clear();
    }
}
?>
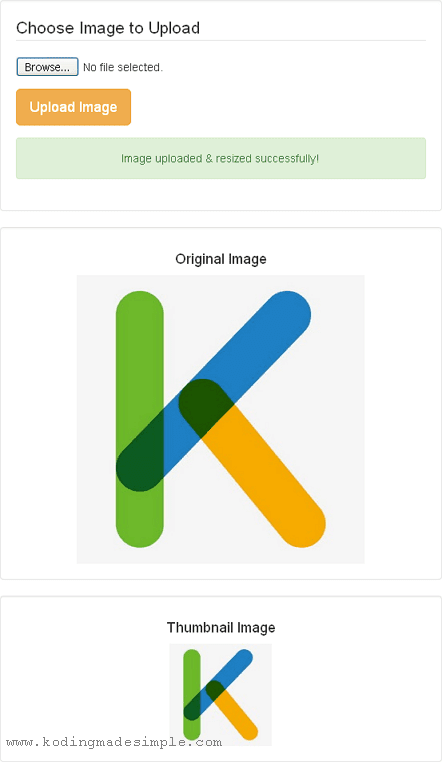
After resizing the image, the controller passes the image filename to the view, where the original and the resized image will be displayed below the upload form.
That's it. We have all the necessary files in place. Now run the controller and choose an image to upload. If everything goes right, you will see the uploaded and thumbnail image at the bottom of the form.

Please make sure you have the GD library installed and pass the file path to the source and target image for resizing and not the url of the image files.
Read Also:- Create Modal Contact Form with CodeIgniter & jQuery AJAX
- How to Download Files from Server / URL in CodeIgniter
That explains about resizing the uploaded image and creating thumbnail in codeigniter. The process is quick and simple. You can also upload multiple images at once in codeigniter and produce thumbnails. It would be easier if you want to resize a large set of images. I hope this tutorial is useful to you. Please share it on social networks if you like it.

Buena informacion, gracias.
ReplyDeleteSaludos :)
not uploading to thumbnails in my program
ReplyDeletecan you please help me?
ReplyDelete