Showing posts with label html. Show all posts

How to Add Select All Options to jQuery Select2 Plug-in

On 4/09/2018 Be the first to comment!

Hi, in this post let's see how to add select all options to jQuery Select2 plugin. Select2 is an excellent alternative to the standard HTML selection box that supports all its functions and provides greater flexibility. The plug-in is easy to setup and use. It supports multiple selection options where the selected elements will be added as pills to the top text box. You can also tag, search and load remote data-sets to select2 control.

Below we will see how to use select2 in your web projects, and select all options at once by ticking a check box using jquery.

jquery select2 select all options on click

How to Use Select2 jQuery Plug-in?

To implement Select2 plug-in in your projects, create a regular drop-down box with html markup as usual.

HTML:

<select id="states" style="width:300px">
    <option>Alaska</option>
    <option>Arizona</option>
    <option>California</option>
    <option>Florida</option>
    <option>Hawaii</option>
    <option>illinois</option>
    <option>Michigan</option>
    <option>North Dacota</option>
    <option>Ohio</option>
    <option>Washington</option>
</select>

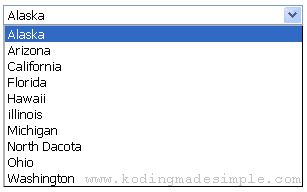
This would produce a select box like this,

standard html select box example

Now load the library files for jquery and select2 on the html page. Do it only once on a page.

CSS:

<link href="https://cdnjs.cloudflare.com/ajax/libs/select2/4.0.2-rc.1/css/select2.min.css" rel="stylesheet" />

JS:

<script src="https://code.jquery.com/jquery-2.1.1.min.js" type="text/javascript"></script>
<script src="https://cdnjs.cloudflare.com/ajax/libs/select2/4.0.2-rc.1/js/select2.min.js" type="text/javascript"></script>

Finally bind the select2() method to the dropdown in this way,

$(document).ready(function() {
    $('#states').select2();
});

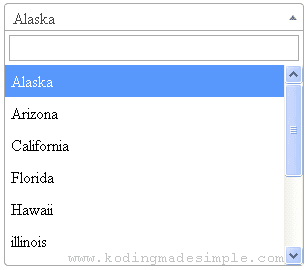
It will initialize the select2 control and convert the plain dropdown to this,

select2 single select example

Please note that you must wrap your code within the $(document).ready() block. This will ensure that the DOM is ready before initializing the select2 control.

Select2 Multiple Select Box:

Select2 also supports multiple selection option. All you have to do is to declare the multiple attribute to the input. This will add the selected options as pills to the text box at the top of the control.

Example:

<select id="states" multiple style="width:300px">
    <option>Alaska</option>
    <option>Arizona</option>
    <option>California</option>
    <option>Florida</option>
    <option>Hawaii</option>
    <option>illinois</option>
    <option>Michigan</option>
    <option>North Dacota</option>
    <option>Ohio</option>
    <option>Washington</option>
</select>

<script type="text/javascript">
$(document).ready(function() {
    $('#states').select2();
});
</script>

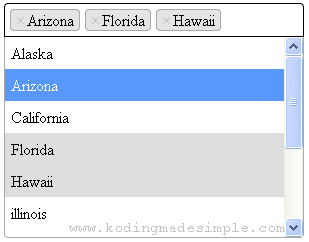
The above example will produce a dropdown box like this,

select2 multi select example

Add Select All Option to jQuery Select2:

Select2 also supports selecting all options at once from the list. Here we'll see how to select all the options when the user ticks the 'Select All' checkbox.

First create the markup for the multi-value select box and a check box for selecting all option.

<select id="states" multiple style="width:300px">
    <option>Alaska</option>
    <option>Arizona</option>
    <option>California</option>
    <option>Florida</option>
    <option>Hawaii</option>
    <option>illinois</option>
    <option>Michigan</option>
    <option>North Dacota</option>
    <option>Ohio</option>
    <option>Washington</option>
</select>

<input id="chkall" type="checkbox" >Select All

Now add this java script to the page.

<script type="text/javascript">
$(document).ready(function() {
    $('#states').select2();
    
    $("#chkall").click(function(){
        if($("#chkall").is(':checked')){
            $("#states > option").prop("selected", "selected");
            $("#states").trigger("change");
        } else {
            $("#states > option").removeAttr("selected");
            $("#states").trigger("change");
        }
    });
});
</script>

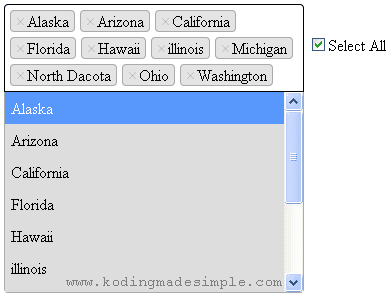
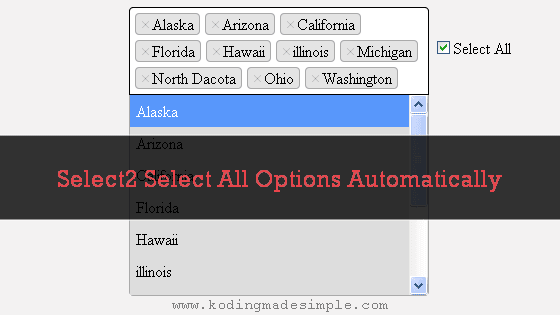
The above script will be executed by onclick() event of the check box. If checked, the script will set all the options of the select control as selected.

If you think this will alone do the job, you're wrong. This will simply keep all items in the dropdown selected, but will not add the selected items to the top of the control. For that we have to explicitly trigger the 'change' event.

select2 select all options example

Read other tutorials of select2,

That explains about jquery select2 and selecting all the options at once on click of the checkbox. The plugin offers so many customizations and adds flexibility to the standard html select box. I hope you like this tutorial. Meet you in another interesting post. Good day!

How to Disable Mouse Right Click using jQuery

On 4/02/2018 Be the first to comment!

Content theft is a serious issue faced by many website / blog owners. This can be limited to a certain level by disabling right click on websites. Disabling mouse right-click will prevent the context menu from appearing, there by preventing the page contents from being copied. Although it is not recommended as the best practice, it is certainly feasible.

It is very easy to disable the right click on your site using jquery. You can do it at page level or element level. You have to capture and cancel the event inside the event handler. We will see how to do it.

jquery disable mouse right click cut copy paste

jQuery - Disable Right Click Context Menu:

You can avoid copying the contents of your website in two ways. One is to disable the right-click context menu altogether and the other is to simply disable the cut, copy and paste operations.

1) To disable the right-click event on the entire web page, use this script,

<script type="text/javascript">
$(document).ready(function(){
    $(this).on('contextmenu', function(e){
        e.preventDefault();
    });
});
</script>

In the above script, the method on() attaches the 'contextmenu' event handler to the document. And the preventDefault() method prevents the default action of the element from happening; here it stops the context menu from showing up.

2) To disable context-menu on mouse right click only on part of the web page, use the element id, class or the element itself.

<script type="text/javascript">
$(document).ready(function(){
    $('#id').on('contextmenu', function(e){
        e.preventDefault();
    });
});
</script>

3) To disable right click context menu on the whole page but on the editable element like textarea, use this,

<script type="text/javascript">
$(document).ready(function(){
    $(this).on('contextmenu', function(e){
        if(e.target.nodeName != "TEXTAREA"){
            e.preventDefault();
        }
    });
});
</script>

Disable Cut, Copy & Paste on Webpage:

The first method will only stop users from copy pasting the contents using mouse. But they can still fire keyboard shortcuts such as CTRL+X (cut), CTRL+C (copy), CTRL+V (paste).

1) To disable just the cut, copy and paste features on your web page, use this,

<script type="text/javascript">
$(document).ready(function(){
    $(this).on('cut copy paste', function(e){
        return false;
    });
});
</script>

2) To disable cut, copy and paste operations on specific page elements, use this,

<script type="text/javascript">
$(document).ready(function(){
    $('#code').on('cut copy paste', function(e){
        return false;
    });
});
</script>
Read Also:

That's a pretty nifty solution for disabling right click on the mouse. In jquery you can use both bind() and on() methods to attach the event handler to an element. Since 'bind' is deprecated from v3.0, use 'on' from here on. I hope this tutorial is useful for you. Please share it on your social circle if you like it.

How to Add Images to Dropdown List using jQuery

On 3/30/2018 Be the first to comment!

Hi! In this post, let's see how to add images to dropdown list using jquery. I had a form with a drop-down element for the list of countries and wanted to insert the corresponding country flag before each country name. But HTML does not support the addition of elements to select box. Then I found some CSS hack but this method is not compatible with all browsers. Finally, I decided to go with java script and found a fairly neat solution.

Actually, it is a jquery plugin called 'select2'. It includes the autocomplete feature to dropdown list, but also allows you to add icons to those select options. Below, I'll show you how to use the select2 add-on to insert country flags before the country names in a drop-down list.

jquery add images to dropdown list

jQuery - Adding Images to the Dropdown List:

STEP-1) First load the 'jQuery' and 'Select2' libraries on the Web page. You need to add both 'css' and 'js' files of the plugin.

<link href="https://cdnjs.cloudflare.com/ajax/libs/select2/4.0.2-rc.1/css/select2.min.css" rel="stylesheet" />

<script src="https://code.jquery.com/jquery-2.1.1.min.js" type="text/javascript"></script>
<script src="https://cdnjs.cloudflare.com/ajax/libs/select2/4.0.2-rc.1/js/select2.min.js" type="text/javascript"></script>

STEP-2) Next, load the library for country flag icons. This will help us to display images of flags of all countries.

<link href="https://cdnjs.cloudflare.com/ajax/libs/flag-icon-css/0.8.2/css/flag-icon.min.css" rel="stylesheet" />

STEP-3) Now create an empty drop down element to add the country names and flags.

<select id="countries">
    <option></option>
</select>

STEP-4) Finally the JavaScript. This is the main part of the task. Here we have to create a JS array that contains all the country names and their IDs and pass it to the drop-down element that we created in the previous step.

<script type="text/javascript">
$(document).ready(function() {
    var options = [
        { id: 'AF', text: 'Afghanistan'},{ id: 'AX', text: 'Aland Islands'},{ id: 'AL', text: 'Albania'},{ id: 'DZ', text: 'Algeria'},{ id: 'AS', text: 'American Samoa'},
        { id: 'AD', text: 'Andorra'},{ id: 'AO', text: 'Angola'},
        { id: 'AI', text: 'Anguilla'},{ id: 'AQ', text: 'Antarctica'},{ id: 'AG', text: 'Antigua And Barbuda'},
        { id: 'AR', text: 'Argentina'},{ id: 'AM', text: 'Armenia'},{ id: 'AW', text: 'Aruba'},
        { id: 'AU', text: 'Australia'},{ id: 'AT', text: 'Austria'},{ id: 'AZ', text: 'Azerbaijan'},{ id: 'BS', text: 'Bahamas'},{ id: 'BH', text: 'Bahrain'},{ id: 'BD', text: 'Bangladesh'},{ id: 'BB', text: 'Barbados'},{ id: 'BY', text: 'Belarus'},{ id: 'BE', text: 'Belgium'},
        { id: 'BZ', text: 'Belize'},{ id: 'BJ', text: 'Benin'},
        { id: 'BM', text: 'Bermuda'},{ id: 'BT', text: 'Bhutan'},
        { id: 'BO', text: 'Bolivia'},{ id: 'BA', text: 'Bosnia And Herzegovina'},{ id: 'BW', text: 'Botswana'},    { id: 'BV', text: 'Bouvet Island'},{ id: 'BR', text: 'Brazil'},
        { id: 'IO', text: 'British Indian Ocean Territory'},{ id: 'BN', text: 'Brunei Darussalam'},{ id: 'BG', text: 'Bulgaria'},{ id: 'BF', text: 'Burkina Faso'},{ id: 'BI', text: 'Burundi'},{ id: 'KH', text: 'Cambodia'},{ id: 'CM', text: 'Cameroon'},{ id: 'CA', text: 'Canada'},
        { id: 'CV', text: 'Cape Verde'},{ id: 'KY', text: 'Cayman Islands'},{ id: 'CF', text: 'Central African Republic'},{ id: 'TD', text: 'Chad'},{ id: 'CL', text: 'Chile'},{ id: 'CN', text: 'China'},{ id: 'CX', text: 'Christmas Island'},{ id: 'CC', text: 'Cocos (Keeling) Islands'},{ id: 'CO', text: 'Colombia'},{ id: 'KM', text: 'Comoros'},{ id: 'CG', text: 'Congo'},{ id: 'CD', text: 'Congo, Democratic Republic Of'},{ id: 'CK', text: 'Cook Islands'},{ id: 'CR', text: 'Costa Rica'},{ id: 'CI', text: 'Cote D\'Ivoire'},{ id: 'HR', text: 'Croatia'},
        { id: 'CU', text: 'Cuba'},{ id: 'CY', text: 'Cyprus'},
        { id: 'CZ', text: 'Czech Republic'},{ id: 'DK', text: 'Denmark'},{ id: 'DJ', text: 'Djibouti'},{ id: 'DM', text: 'Dominica'},{ id: 'DO', text: 'Dominican Republic'},
        { id: 'EC', text: 'Ecuador'},{ id: 'EG', text: 'Egypt'},
        { id: 'SV', text: 'El Salvador'},{ id: 'GQ', text: 'Equatorial Guinea'},{ id: 'ER', text: 'Eritrea'},
        { id: 'EE', text: 'Estonia'},{ id: 'ET', text: 'Ethiopia'},{ id: 'FK', text: 'Falkland Islands (Malvinas)'},
        { id: 'FO', text: 'Faroe Islands'},{ id: 'FJ', text: 'Fiji'},{ id: 'FI', text: 'Finland'},{ id: 'FR', text: 'France'},{ id: 'GF', text: 'French Guiana'},{ id: 'PF', text: 'French Polynesia'},{ id: 'TF', text: 'French Southern Territories'},{ id: 'GA', text: 'Gabon'},{ id: 'GM', text: 'Gambia'},{ id: 'GE', text: 'Georgia'},{ id: 'DE', text: 'Germany'},{ id: 'GH', text: 'Ghana'},{ id: 'GI', text: 'Gibraltar'},{ id: 'GR', text: 'Greece'},
        { id: 'GL', text: 'Greenland'},{ id: 'GD', text: 'Grenada'},{ id: 'GP', text: 'Guadeloupe'},{ id: 'GU', text: 'Guam'},{ id: 'GT', text: 'Guatemala'},{ id: 'GG', text: 'Guernsey'},{ id: 'GN', text: 'Guinea'},{ id: 'GW', text: 'Guinea-Bissau'},{ id: 'GY', text: 'Guyana'},
        { id: 'HT', text: 'Haiti'},{ id: 'HM', text: 'Heard Island & Mcdonald Islands'},{ id: 'VA', text: 'Holy See (Vatican City State)'},{ id: 'HN', text: 'Honduras'},
        { id: 'HK', text: 'Hong Kong'},{ id: 'HU', text: 'Hungary'},{ id: 'IS', text: 'Iceland'},
        { id: 'IN', text: 'India'},{ id: 'ID', text: 'Indonesia'},
        { id: 'IR', text: 'Iran, Islamic Republic Of'},{ id: 'IQ', text: 'Iraq'},{ id: 'IE', text: 'Ireland'},{ id: 'IM', text: 'Isle Of Man'},{ id: 'IL', text: 'Israel'},
        { id: 'IT', text: 'Italy'},{ id: 'JM', text: 'Jamaica'},
        { id: 'JP', text: 'Japan'},{ id: 'JE', text: 'Jersey'},
        { id: 'JO', text: 'Jordan'},{ id: 'KZ', text: 'Kazakhstan'},{ id: 'KE', text: 'Kenya'},{ id: 'KI', text: 'Kiribati'},{ id: 'KR', text: 'Korea'},{ id: 'KW', text: 'Kuwait'},{ id: 'KG', text: 'Kyrgyzstan'},{ id: 'LA', text: 'Lao People\'s Democratic Republic'},{ id: 'LV', text: 'Latvia'},{ id: 'LB', text: 'Lebanon'},{ id: 'LS', text: 'Lesotho'},{ id: 'LR', text: 'Liberia'},{ id: 'LY', text: 'Libyan Arab Jamahiriya'},{ id: 'LI', text: 'Liechtenstein'},{ id: 'LT', text: 'Lithuania'},{ id: 'LU', text: 'Luxembourg'},{ id: 'MO', text: 'Macao'},
        { id: 'MK', text: 'Macedonia'},{ id: 'MG', text: 'Madagascar'},{ id: 'MW', text: 'Malawi'},{ id: 'MY', text: 'Malaysia'},{ id: 'MV', text: 'Maldives'},
        { id: 'ML', text: 'Mali'},{ id: 'MT', text: 'Malta'},
        { id: 'MH', text: 'Marshall Islands'},{ id: 'MQ', text: 'Martinique'},{ id: 'MR', text: 'Mauritania'},{ id: 'MU', text: 'Mauritius'},{ id: 'YT', text: 'Mayotte'},
        { id: 'MX', text: 'Mexico'},{ id: 'FM', text: 'Micronesia, Federated States Of'},{ id: 'MD', text: 'Moldova'},{ id: 'MC', text: 'Monaco'},{ id: 'MN', text: 'Mongolia'},{ id: 'ME', text: 'Montenegro'},{ id: 'MS', text: 'Montserrat'},{ id: 'MA', text: 'Morocco'},{ id: 'MZ', text: 'Mozambique'},{ id: 'MM', text: 'Myanmar'},
        { id: 'NA', text: 'Namibia'},{ id: 'NR', text: 'Nauru'},
        { id: 'NP', text: 'Nepal'},{ id: 'NL', text: 'Netherlands'},{ id: 'AN', text: 'Netherlands Antilles'},
        { id: 'NC', text: 'New Caledonia'},{ id: 'NZ', text: 'New Zealand'},{ id: 'NI', text: 'Nicaragua'},{ id: 'NE', text: 'Niger'},{ id: 'NG', text: 'Nigeria'},{ id: 'NU', text: 'Niue'},{ id: 'NF', text: 'Norfolk Island'},{ id: 'MP', text: 'Northern Mariana Islands'},{ id: 'NO', text: 'Norway'},{ id: 'OM', text: 'Oman'},{ id: 'PK', text: 'Pakistan'},{ id: 'PW', text: 'Palau'},{ id: 'PS', text: 'Palestinian Territory, Occupied'},{ id: 'PA', text: 'Panama'},{ id: 'PG', text: 'Papua New Guinea'},{ id: 'PY', text: 'Paraguay'},{ id: 'PE', text: 'Peru'},
        { id: 'PH', text: 'Philippines'},{ id: 'PN', text: 'Pitcairn'},{ id: 'PL', text: 'Poland'},{ id: 'PT', text: 'Portugal'},{ id: 'PR', text: 'Puerto Rico'},{ id: 'QA', text: 'Qatar'},{ id: 'RE', text: 'Reunion'},
        { id: 'RO', text: 'Romania'},{ id: 'RU', text: 'Russian Federation'},{ id: 'RW', text: 'Rwanda'},{ id: 'BL', text: 'Saint Barthelemy'},{ id: 'SH', text: 'Saint Helena'},
        { id: 'KN', text: 'Saint Kitts And Nevis'},{ id: 'LC', text: 'Saint Lucia'},{ id: 'MF', text: 'Saint Martin'},
        { id: 'PM', text: 'Saint Pierre And Miquelon'},{ id: 'VC', text: 'Saint Vincent And Grenadines'},{ id: 'WS', text: 'Samoa'},{ id: 'SM', text: 'San Marino'},{ id: 'ST', text: 'Sao Tome And Principe'},{ id: 'SA', text: 'Saudi Arabia'},{ id: 'SN', text: 'Senegal'},{ id: 'RS', text: 'Serbia'},{ id: 'SC', text: 'Seychelles'},{ id: 'SL', text: 'Sierra Leone'},{ id: 'SG', text: 'Singapore'},{ id: 'SK', text: 'Slovakia'},{ id: 'SI', text: 'Slovenia'},
        { id: 'SB', text: 'Solomon Islands'},{ id: 'SO', text: 'Somalia'},{ id: 'ZA', text: 'South Africa'},{ id: 'GS', text: 'South Georgia And Sandwich Isl.'},{ id: 'ES', text: 'Spain'},{ id: 'LK', text: 'Sri Lanka'},
        { id: 'SD', text: 'Sudan'},{ id: 'SR', text: 'Suriname'},
        { id: 'SJ', text: 'Svalbard And Jan Mayen'},{ id: 'SZ', text: 'Swaziland'},{ id: 'SE', text: 'Sweden'},{ id: 'CH', text: 'Switzerland'},{ id: 'SY', text: 'Syrian Arab Republic'},{ id: 'TW', text: 'Taiwan'},{ id: 'TJ', text: 'Tajikistan'},{ id: 'TZ', text: 'Tanzania'},
        { id: 'TH', text: 'Thailand'},{ id: 'TL', text: 'Timor-Leste'},{ id: 'TG', text: 'Togo'},{ id: 'TK', text: 'Tokelau'},{ id: 'TO', text: 'Tonga'},{ id: 'TT', text: 'Trinidad And Tobago'},{ id: 'TN', text: 'Tunisia'},
        { id: 'TR', text: 'Turkey'},{ id: 'TM', text: 'Turkmenistan'},{ id: 'TC', text: 'Turks And Caicos Islands'},{ id: 'TV', text: 'Tuvalu'},{ id: 'UG', text: 'Uganda'},{ id: 'UA', text: 'Ukraine'},{ id: 'AE', text: 'United Arab Emirates'},{ id: 'GB', text: 'United Kingdom'},{ id: 'US', text: 'United States'},{ id: 'UM', text: 'United States Outlying Islands'},{ id: 'UY', text: 'Uruguay'},{ id: 'UZ', text: 'Uzbekistan'},{ id: 'VU', text: 'Vanuatu'},{ id: 'VE', text: 'Venezuela'},{ id: 'VN', text: 'Viet Nam'},{ id: 'VG', text: 'Virgin Islands, British'},{ id: 'VI', text: 'Virgin Islands, U.S.'},{ id: 'WF', text: 'Wallis And Futuna'},{ id: 'EH', text: 'Western Sahara'},{ id: 'YE', text: 'Yemen'},
        { id: 'ZM', text: 'Zambia'},{ id: 'ZW', text: 'Zimbabwe'}
    ];
    $('#countries').select2({
        placeholder: '-Select Country-',
        templateResult: formatCountry,
        data: options
    });
    
    function formatCountry(country){
        if (!country.id) {
            return country.text;
        }
        var $country = $(
            '<span class="flag-icon flag-icon-'+ country.id.toLowerCase() +' flag-icon-squared"></span>' + '<span style="margin-left:10px;">'+ country.text+'</span>'
        );
        return $country;
    };
});
</script>

In the above script, the select2() method will simply replace the plain dropdown with a more customizable one. We also have to set the formatting function to the templateResult option. This will execute the function for each option in the drop down and will add a country flag image to it.

Run the script and you will see a nice dropdown that shows the country names with their flags. It also includes an amazing search box which will autosuggest the names of countries when you start typing.

insert country flag images before country names select2
Read Also:

Likewise, you can add images to the select box using the jquery select2 plugin. It's a nifty add-on that gives you more control over the element which you never get with HTML. I hope this tutorial is useful for you. Please share it on social media if you like it.
How to Print Contents of a Div using JavaScript

On 1/12/2018 Be the first to comment!

Hi! Today let's see how to print contents of a div using javascript. Have you ever tried printing a web page or part of a page programmatically? There is an interesting utility in JavaScript called print(). It is one of the methods of the 'Window' object and is used to trigger your system's printing feature.

In case you want to print part of a page area, the simple solution is to place all the printable content inside a 'div' block and invoke the print action with some user event. Let's see how to do it.

javascript print contents of a div

Print Contents of a Div in JavaScript:

Let's first create a div container to hold the printable part.

<!DOCTYPE html>
<html>
<head>
    <meta charset="utf-8"> 
    <meta name="viewport" content="width=device-width, initial-scale=1.0">
    <title>Print Part of a Webpage with JavaScript</title>
    <link href="https://maxcdn.bootstrapcdn.com/bootstrap/3.3.7/css/bootstrap.min.css" rel="stylesheet" type="text/css" />
</head>
<body>
<div class="container">
    <div id="printableDiv" class="jumbotron">
        <h2>Test Printing</h2>
        <p>Lorem ipsum dolor sit amet, consectetuer adipiscing elit. Aenean commodo ligula eget dolor. Aenean massa. Cum sociis natoque penatibus et magnis dis parturient montes, nascetur ridiculus mus. Donec quam felis, ultricies nec, pellentesque eu, pretium quis, sem. Nulla consequat massa quis enim.</p>
    </div>
</div>
</body>
</html>

In the above markup, we have created a <div> container with an id #printableDiv and placed some text inside. This is the block we need to print.

Next add a button element to trigger the print action when the user clicks on it.

<button type="button" class="btn btn-warning btn-lg" onclick="printIt('printableDiv')">Print this block</button>

Include onclick event to the button and pass the id of the div we have created earlier.

Finally the printing part! Write a simple java script function to print the div contents.

JavaScript:

<script type="text/javascript">
function printIt(divID) {
    var divContent = document.getElementById(divID);
    var WinPrint = window.open('', '', 'width=800,height=600');
    WinPrint.document.write('<link rel="stylesheet" type="text/css" href="https://maxcdn.bootstrapcdn.com/bootstrap/3.3.7/css/bootstrap.min.css">');
    WinPrint.document.write(divContent.innerHTML);
    WinPrint.document.close();
    WinPrint.focus();
    WinPrint.print();
    WinPrint.close();
}
</script>

The js function will open a window of defined width and height, write the contents of the div to it and invokes printing window using the print() function.

Keep in mind that the contents will be printed without any css styles you have in the webpage. To preserve styles, you must link the css file using windowsobject. document.write() method like I did in the JS code.

One good thing about using this method is it will not fire printing immediately, but the print window as a means of confirmation - just leaving the choice to users in case they clicked on it accidentally.

Read Also:

That explains printing div contents using javascript. The method described in this post is very useful to print a portion of a webpage. You just have to keep all the printable contents in a div block and trigger the java script function. I hope you like this tutorial. Please share it in your social circle if you find it useful.

Autocomplete Textbox using HTML5 Datalist, PHP and MySQL Example

On 12/12/2017 7 Comments so far

Autosuggest Textbox is a cool technique to enhance user experience in websites. It's a google like search box which pops up suggestions while you type and lets you choose the word(s) without typing it completely. Usually this feature requires third party tools like jquery plug-ins to implement but thanks to HTML5, you can do it with plain html and php alone. In this tutorial, I'm going to show you, how easy it is to integrate HTML5 auto complete textbox from database using PHP and MySQL.

Autocomplete Textbox from Database using HTML5 and PHP

The HTML5 DATALIST element adds up autocomplete feature to ordinary textboxes and it takes up several options similar to SELECT element. To implement auto suggest from database, we should fetch the data and populate it to the datalist options. Finally integrate this datalist to a textbox element and we are done. Let's see how to do it in php and mysql.

Step-1: Connect to MySQL Database in PHP

First establish the connection to mysql database in php.

<?php
//connect to mysql database
$connection = mysqli_connect("localhost","username","password","store") or die("Error " . mysqli_error($connection));
?>

Step-2: Fetch the Required Data from MySQL Table

Now fetch the required mysql table field data from database. Here I wish to select the list of category names from the 'category' table.

<?php
//fetch data from database
$sql = "select cname from category";
$result = mysqli_query($connection, $sql) or die("Error " . mysqli_error($connection));
?>

Step-3: Create Datalist with MySQL Data

Next create a datalist element, loop through the mysql resultset and add the category names one by one to the datalist options.

<datalist id="categoryname">
    <?php while($row = mysqli_fetch_array($result)) { ?>
        <option value="<?php echo $row['cname']; ?>"><?php echo $row['cname']; ?></option>
    <?php } ?>
</datalist>

Step-4: Integrate Datalist with a Textbox

Next create an input element and set its LIST attribute to datalist's ID.

<input type="text" id="pcategory" autocomplete="off" list="categoryname">

It simply binds the textbox with the datalist OPTIONS and suitable suggestions pops up when the user type something in the box. We also used autocomplete = "off" to disable the browser's default autocomplete feature for proper functioning of our own autosuggest feature.

Step-5: Close the Database Connection

Finally close the mysql database connection we have established earlier.

<?php mysqli_close($connection); ?>

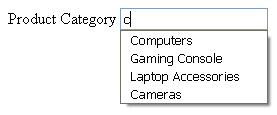
That's it. Now go and check it in your browser and see the auto complete textbox works like a charm (Only in HTML5 supported browsers).

autosuggest-textbox-in-html5-php-mysql-example
Autocomplete Textbox in HTML5 Example

Complete Code for HTML5 Autocomplete Textbox

<?php
//connect to mysql database
$connection = mysqli_connect("localhost","username","password","store") or die("Error " . mysqli_error($connection));

//fetch data from database
$sql = "select cname from category";
$result = mysqli_query($connection, $sql) or die("Error " . mysqli_error($connection));
?>
<!DOCTYPE html>
<html>
<head>
    <title>Autocomplete Textbox in HTML5 PHP and MySQL</title>
</head>
<body>
    <label for="pcategory">Product Category</label>
    <input type="text" list="categoryname" autocomplete="off" id="pcategory">
    <datalist id="categoryname">
        <?php while($row = mysqli_fetch_array($result)) { ?>
            <option value="<?php echo $row['cname']; ?>"><?php echo $row['cname']; ?></option>
        <?php } ?>
    </datalist>
    <?php mysqli_close($connection); ?>
</body>
</html>

Also Read: How to Insert JSON File into MySQL Database using PHP

Don't Miss: How to Insert CSV File into MySQL Database using PHP

And that was all about implementing autocomplete textbox in html5 and php. If you want the auto complete with more styling options, then using jQuery UI plug-in is the best option. Read this tutorial to learn about using jquery ui for autocomplete textbox in php and mysql.

How to Embed PDF File in HTML Page

On 12/12/2017 5 Comments so far

Hi, today we’ll see how to embed pdf file in a html page directly. Some websites tend to show pdf files directly on their site’s webpages instead of giving a download link for the files. Thanks to HTML5, you can also do the same with simple html code without using any third party solutions. The method we are going to see is the quick and easy solution which gives you some control over how the pdf file is shown to the user. Also it works on all modern web browsers that support HTML5.

How to Embed PDF File in HTML Page

HTML5 provides <embed> element which acts as a container for external application like image, videos, mp3 files or other multimedia objects. Using this tag makes the browser to automatically include controls for the multimedia objects (in case the browser supports the particular media type).

We are going to use this <embed> tag to show the pdf files in the web page without using complex third party scripts. Open the html page in which you want to embed the file and include the below markup wherever you want the pdf file to be shown.

<embed width="600" height="450" src="mypdf.pdf" type="application/pdf"></embed>

The attributes width and height represents the width and height of the pdf container in pixels.

The attribute src is the path to the pdf file to be embedded.

The attribute type is the media type of the embedded content.

Now you open the file in browser and the pdf file is shown in the html page like this.

how to embed pdf file in html page
Read Also:

I hope you like this simple solution to embed the pdf files in website’s html page without hassle.

How to Read and Parse JSON String in jQuery and Display in HTML Table

On 12/11/2017 4 Comments so far

Hi, in today’s post we’ll see How to Read and Parse JSON String in jQuery. JSON is a human readable data exchange format used among web services and it's a necessary skill for modern day web developers (frontend/backend) to deal with JSON data received from various third-party APIs. Keeping that in mind we have discussed about parsing json data using php script sometime back. And now we have come up with this jquery tutorial which walks you through the process of parsing json string using jquery library, convert and display it into an html table.

how-to-read-and-parse-json-string-in-jquery

How to Read and Parse JSON String in jQuery?

jQuery provides several JSON methods like “getJSON”, “parseJSON”, “stringify” and for this post we’ll pickout and use the method “parseJSON”, which parses through well formed json string and returns javascript object.

JSON.parseJSON(JSON STRING)

The function parseJSON() takes the string parameter and returns String, Number, Object, Array or Boolean.

Using this jQuery method we can easily convert the json string to object and display it in a table. Let’s see how to do it.

Step-1: First create a <div> block as a placeholder for the html table.

<div id="datalist"></div>

Step-2: Next add some table formatting with css styles.

<style type="text/css">
    table {
        border: 1px solid #777;
        border-collapse: collapse;
    } 

    table tr th,
    table tr td {
        border: 1px solid #777;
    }
</style>

Step-3: Next load the javascript jQuery library above the closing body tag of the html file.

<script src="/path/to/jquery-1.10.2.min.js"></script>

Step-4: Next add the jquery method to parse a json string and iterate over the collection to display it as a list in a html table element.

<script>
$(document).ready(function() {
    var data = '[{ "firstName": "John", "lastName": "Smith" }, { "firstName": "Peter", "lastName": "Jason" }, { "firstName": "Alice", "lastName": "Ray" }]';
    var table = '<table><thead><th>First Name</th><th>Last Name</th></thead><tbody>';
    var obj = $.parseJSON(data);
    $.each(obj, function() {
        table += '<tr><td>' + this['firstName'] + '</td><td>' + this['lastName'] + '</td></tr>';
    });
    table += '</tbody></table>';
    document.getElementById("datalist").innerHTML = table;
});
</script>

The variable “data” holds a valid JSON string with first and last names for three different persons and the jquery function “$.parseJSON(data)” converts that json string to java script object. And using the jQuery’s $.each() method we seamlessly iterates over the collection of object and display in a table view.

Now open the file in the browser and you will get the list of names neatly displayed in the html table.

parse-json-and-convert-to-html-table-jquery
JSON Data Displayed in the HTML Table using jQuery

Here is the complete html and javascript for parsing JSON string in jQuery.

index.html

<!DOCTYPE html>
<html>
<head>
    <meta charset="utf-8" />
    <title>Read and Parse JSON String in jQuery | Example</title>
    <style type="text/css">
    table {
        border: 1px solid #777;
        border-collapse: collapse;
    } 

    table tr th,
    table tr td {
        border: 1px solid #777;
    }
    </style>
</head>
<body>
    <div id="datalist"></div>

    <script src="/path/to/js/jquery-1.10.2.min.js"></script>
    <script>
    $(document).ready(function() {
        var data = '[{ "firstName": "John", "lastName": "Smith" }, { "firstName": "Peter", "lastName": "Jason" }, { "firstName": "Alice", "lastName": "Ray" }]';
        var table = '<table><thead><th>First Name</th><th>Last Name</th></thead><tbody>';
        var obj = $.parseJSON(data);
        $.each(obj, function() {
            table += '<tr><td>' + this['firstName'] + '</td><td>' + this['lastName'] + '</td></tr>';
        });
        table += '</tbody></table>';
        document.getElementById("datalist").innerHTML = table;
    });
    </script>
</body>
</html>
Read Also:

And that was all about reading and parsing json string using jQuery.

How to Convert JSON Data to HTML Table using jQuery DataTables Plug-in

On 12/11/2017 17 Comments so far

Hi, this time I have come up with a jquery basics tutorial which discusses about how to convert json to html table. In simple terms we are going to use jquery to display data from a json file in neat table format with added pagination and search options to it. To make our life easier there is an excellent jquery plug-in called ‘DataTables’ which we will use for this task. DataTables is a flexible jquery tool which adds up advanced interaction controls to any HTML table. Using this we can easily add pagination, instant search or multi-column ordering to the html table. Moreover it supports all modern day data sources like DOM, JavaScript, Ajax and server-side processing.

Convert JSON Data to HTML Table using jQuery

As an example let’s take the below sample json file which contains an array of objects and display it in html table using datatables.

Don't Miss: How to Create Responsive Carousel Image Slider

Also Read: How to Create Image Lightbox Effect with jQuery

empdata.json

{
  "data": [
    {
      "name": "Garrett Winters",
      "designation": "Accountant",
      "salary": "$170,750",
      "joining_date": "2011/07/25",
      "office": "Tokyo",
      "extension": "8422"
    },
    {
      "name": "Brielle Williamson",
      "designation": "Integration Specialist",
      "salary": "$372,000",
      "joining_date": "2012/12/02",
      "office": "New York",
      "extension": "4804"
    },
    {
      "name": "Ashton Cox",
      "designation": "Junior Technical Author",
      "salary": "$86,000",
      "joining_date": "2009/01/12",
      "office": "San Francisco",
      "extension": "1562"
    },
    {
      "name": "Airi Satou",
      "designation": "Accountant",
      "salary": "$162,700",
      "joining_date": "2008/11/28",
      "office": "Tokyo",
      "extension": "5407"
    },
    {
      "name": "Caesar Vance",
      "designation": "Pre-Sales Support",
      "salary": "$106,450",
      "joining_date": "2011/12/12",
      "office": "New York",
      "extension": "8330"
    },
    {
      "name": "Shad Decker",
      "designation": "Regional Director",
      "salary": "$183,000",
      "joining_date": "2008/11/13",
      "office": "Edinburgh",
      "extension": "6373"
    },
    {
      "name": "Cedric Kelly",
      "designation": "Senior Javascript Developer",
      "salary": "$433,060",
      "joining_date": "2012/03/29",
      "office": "Edinburgh",
      "extension": "6224"
    },
    {
      "name": "Haley Kennedy",
      "designation": "Senior Marketing Designer",
      "salary": "$313,500",
      "joining_date": "2012/12/18",
      "office": "London",
      "extension": "3597"
    },
    {
      "name": "Colleen Hurst",
      "designation": "Javascript Developer",
      "salary": "$205,500",
      "joining_date": "2009/09/15",
      "office": "San Francisco",
      "extension": "2360"
    },
    {
      "name": "Dai Rios",
      "designation": "Personnel Lead",
      "salary": "$217,500",
      "joining_date": "2012/09/26",
      "office": "Edinburgh",
      "extension": "2290"
    },
    {
      "name": "Herrod Chandler",
      "designation": "Sales Assistant",
      "salary": "$137,500",
      "joining_date": "2012/08/06",
      "office": "San Francisco",
      "extension": "9608"
    },
    {
      "name": "Rhona Davidson",
      "designation": "Integration Specialist",
      "salary": "$327,900",
      "joining_date": "2010/10/14",
      "office": "Tokyo",
      "extension": "6200"
    },
    {
      "name": "Sonya Frost",
      "designation": "Software Engineer",
      "salary": "$103,600",
      "joining_date": "2008/12/13",
      "office": "Edinburgh",
      "extension": "1667"
    },
    {
      "name": "Jena Gaines",
      "designation": "Office Manager",
      "salary": "$90,560",
      "joining_date": "2008/12/19",
      "office": "London",
      "extension": "3814"
    },
    {
      "name": "Quinn Flynn",
      "designation": "Support Lead",
      "salary": "$342,000",
      "joining_date": "2013/03/03",
      "office": "Edinburgh",
      "extension": "9497"
    }
  ]
}

Now let's see about converting this json data to html table.

Step 1: First you need the datatables plug-in in place to start working. So download datatables plug-in here and extract its contents and move ‘media’ directory to your working folder.

Step 2: Having the required datatables files in place, now we have to link them to the html file. Create a file ‘index.html’ and link the datatables ‘css’ and ‘js’ files like this.

<html>
<head>
    <!-- link datatables css -->
    <link rel="stylesheet" type="text/css" href="/path/to/jquery.dataTables.css">
</head>
<body>

    ...

    <!-- load jquery -->
    <script type="text/javascript" src="/path/to/jquery-1.10.2.js"></script>
    <!-- load datatables js library -->
    <script type="text/javascript" src="/path/to/jquery.dataTables.js"></script>
</body>
</html>

Remember to include the jquery library before datatables ‘js’ file as the plug in is built over jquery.

Step 3: Now it's time to create a html table structure which we will map to our json data source later. We should determine what are the columns we want to appear on the table and create the table's header and footer with appropriate column names.

<table id="empTable" class="display" width="100%" cellspacing="0">
    <thead>
        <tr>
            <th>Name</th>
            <th>Designation</th>
            <th>Office</th>
            <th>Extension</th>
            <th>Joining Date</th>
            <th>Salary</th>
        </tr>
    </thead>

    <tfoot>
        <tr>
            <th>Name</th>
            <th>Designation</th>
            <th>Office</th>
            <th>Extension</th>
            <th>Joining Date</th>
            <th>Salary</th>
        </tr>
    </tfoot>
</table>

Using the css class ‘.display’ will create the table with alternative striped rows (zebra cross style).

Step 4: Finally we should populate the html table with the data from json source by mapping to the right table columns.

<script type="text/javascript">
$( document ).ready(function() {
    $('#empTable').dataTable({
        "ajax": "empdata.json",
        "columns": [
            {"data": "name"},
            {"data": "designation"},
            {"data": "office"},
            {"data": "extension"},
            {"data": "joining_date"},
            {"data": "salary"}
        ]
    });   
});
</script>

- The dataTable() method will initialize the datatables. Its behavior can be controlled by passing parameters for various options and we have used two options in the above code. (I planned to keep the code as simple as possible and used only the basic options required but you can try out more).

- The ajax option will load the data from the given ajax source. Here in our case it’s the path to the json file.

- The columns option will map the table columns to the data source keys.

Now run the index.html file and you can see a nicely designed html table with added enhancements like instant-search at the top and pagination links at the bottom. You can also sort the table columns like you prefer.

display-json-data-in-html-table-datatables-jquery-example
JSON Data Displayed in HTML Table using jQuery Datatables Plug-in

Complete Code for index.html

<!DOCTYPE html>
<html>
<head>
    <title>Display JSON File Data in Datatables | Example</title>
    <!-- link datatables css -->
    <link rel="stylesheet" type="text/css" href="/path/to/jquery.dataTables.css">
</head>
<body>
    <table id="empTable" class="display" width="100%" cellspacing="0">
        <thead>
            <tr>
                <th>Name</th>
                <th>Designation</th>
                <th>Office</th>
                <th>Extension</th>
                <th>Joining Date</th>
                <th>Salary</th>
            </tr>
        </thead>
        <tfoot>
            <tr>
                <th>Name</th>
                <th>Designation</th>
                <th>Office</th>
                <th>Extension</th>
                <th>Joining Date</th>
                <th>Salary</th>
            </tr>
        </tfoot>
    </table>
    
    <!-- load jquery -->
    <script type="text/javascript" src="/path/to/jquery-1.10.2.js"></script>
    <!-- load datatables js library -->
    <script type="text/javascript" src="/path/to/jquery.dataTables.js"></script>
    
    <script type="text/javascript">
    $(document).ready(function() {
        $('#empTable').dataTable({
            "ajax": "empdata.json",
            "columns": [
                {"data": "name"},
                {"data": "designation"},
                {"data": "office"},
                {"data": "extension"},
                {"data": "joining_date"},
                {"data": "salary"}
            ]
        });   
    });
    </script>
</body>
</html>

I hope this basic jquery tutorial gives you a good idea about converting json data to html table using datatables jquery plugin.

Read Also:

As said earlier it's a highly flexible tool and provides wide range of options to completely customize the looks and behavior of the html tables to meet your requirements. Don't hesitate to try out :-)

Inline Editing using PHP MySQL and jQuery AJAX

On 12/08/2017 Be the first to comment!

Hi! Today we will see about ajax inline editing using php and mysql. Inline editing allows users to rapidly modify web page contents in place without the requirement of forms. Popular sites like Facebook, Twitter, etc. employ this technique so that users can change their profile information without having to navigate through separate forms. Using HTML5's 'contenteditable' on page elements will take care of inline editing. For example, you can convert a plain html table into an editable table by setting 'contenteditable = true'.

If you are new to inline editing, take a look at html5 editable table tutorial.

PHP MySQL Inline Editing using jQuery AJAX:

The 'contenteditable' attribute can be used on almost all html elements, but the data edited by user is only temporary. It will be lost when the page is refreshed. Therefore, you must use ajax to send the data back to the server and store it in database for future use.

Here, let's see a demo with editable html table listing records from mysql table. Each time the user makes some changes, the edited data will be sent to the server through an ajax call and will be updated in the database using php.

During editing, the table cell will change to red background and to green when completed.

We'll need the following files for our demo,

  1. Bootstrap.css - To design the user interface
  2. jQuery.js - To post data to server via ajax
  3. dbconnect.php - Takes care of database connection
  4. index.php - Main user interface that contains html table, css and javascript functions.
  5. savecustomer.php - PHP script to update database table.

STEP-1) Create Database

First we need a mysql database and table to use in our example. Run this below sql file on mysql. It will create a database, a table and add some sample records in it.

CREATE DATABASE `mysite`;
USE `mysite`;

CREATE TABLE IF NOT EXISTS `customers` (
  `id` int(8) NOT NULL AUTO_INCREMENT,
  `name` varchar(50) NOT NULL,
  `email` varchar(60) NOT NULL,
  `location` varchar(50) NOT NULL,
  PRIMARY KEY (`id`)
) ENGINE=MyISAM  DEFAULT CHARSET=latin1 AUTO_INCREMENT=11 ;

INSERT INTO `customers` (`id`, `name`, `email`, `location`) VALUES
(1, 'Jim Connor', 'jimconnor@yahoo.com', 'Las Vegas'),
(2, 'Mark Higgins', 'mark.higgins21@yahoo.com', 'San Francisco'),
(3, 'Austin Joseph', 'austin.joseph.boston@gmail.com', 'Boston'),
(4, 'Sean Kennedy', 'seankennedy01@gmail.com', 'Seattle'),
(5, 'Rose Harris', 'roseharris@gmail.com', 'New York'),
(6, 'Lilly Whites', 'lillywhites@outlook.com', 'New York'),
(7, 'Jennifer Winters', 'jennie.winters001@gmail.com', 'Miami'),
(8, 'Michael Bruce', 'michaelbruce78@yahoo.com', 'Los Angeles'),
(9, 'John Alex', 'johnalex@example.com', 'Chicago'),
(10, 'Demi Milan', 'demimilan@gmail.com', 'Austin');

STEP-2) Open Database Connection

Next, we must establish the connection to database. The following script will open a php-mysql connection.

dbconnect.php

<?php
// connection settings
$hostname = 'localhost';
$username = 'root';
$password = '';
$database = 'mysite';

//connect to mysql database
$con = mysqli_connect($hostname, $username, $password, $database) or die("Error " . mysqli_error($con));
?>

STEP-3) Fetch Records from MySQL Table

Next fetch records from the mysql table we have created in step-1.

<?php
include_once 'dbconnect.php';

// fetch records
$sql = "select * from customers order by id";
$result = mysqli_query($con, $sql);
?>

STEP-4) Create HTML5 Editable Table

Then create an html5 table with inline editing enabled. And loop through the mysql resultset and display the records on the table one by one.

<div id="mytable">
    <h3 class="text-center bg-primary">AJAX Inline Editing HTML5 Table - Demo</h3>
    <table class="table table-bordered">
        <tr class="bg-primary">
            <th>ID</th>
            <th>Name</th>
            <th>Email</th>
            <th>Location</th>
        </tr>
        <?php
        while($row = mysqli_fetch_array($result)) { ?>
        <tr>
            <td><?php echo $row['id']; ?></td>
            <td contenteditable="true" onfocus="changeBackground(this);" onblur="saveData(this, '<?php echo $row["id"]; ?>', 'name');"><?php echo $row['name']; ?></td>
            <td contenteditable="true" onfocus="changeBackground(this);" onblur="saveData(this, '<?php echo $row["id"]; ?>', 'email');"><?php echo $row['email']; ?></td>
            <td contenteditable="true" onfocus="changeBackground(this);" onblur="saveData(this, '<?php echo $row["id"]; ?>', 'location');"><?php echo $row['location']; ?></td>
        </tr>
        <?php } ?>
    </table>
</div>

In the above markup, we have added two event functions for each cell in the table. One is to change the background color on focus and the other is to submit edited cell data to the server on blur event.

STEP-5) Change Table Cell Background On Focus

Now it's time to add javascript functions. First let's create the changeBackground() method which will change the background color of the cell to red when it gets focus.

function changeBackground(obj) {
    $(obj).removeClass("bg-success");
    $(obj).addClass("bg-danger");
}

STEP-6) Make AJAX Call to Server

Next is the ajax function saveData(). This function will post the edited data, record id and column name to the server as a json string. Once the database update is complete, the background color of the <td> element will change to green.

function saveData(obj, id, column) {
    var customer = {
        id: id,
        column: column,
        value: obj.innerHTML
    }
    $.ajax({
        type: "POST",
        url: "savecustomer.php",
        data: customer,
        dataType: 'json',
        success: function(data){
            if (data) {
                $(obj).removeClass("bg-danger");
                $(obj).addClass("bg-success");
            }
        }
   });
}

Following is the complete script for the index.php file.

index.php

<?php
include_once 'dbconnect.php';
// fetch records
$sql = "select * from customers order by id";
$result = mysqli_query($con, $sql);
?>

<!DOCTYPE html>
<html>
<head>
    <title>Inline Editing in PHP MySQL</title>
    <meta charset="utf-8"> 
    <meta content="width=device-width, initial-scale=1.0" name="viewport" >
    <link rel="stylesheet" href="css/bootstrap.css" type="text/css" />
    <style type="text/css">
    #mytable {
        margin: 0 auto;
        width: 60%;
    }
    </style>
</head>
<body>
<br/>
    <div id="mytable">
        <h3 class="text-center bg-primary">AJAX Inline Editing HTML5 Table - Demo</h3>
        <table class="table table-bordered">
            <tr class="bg-primary">
                <th>ID</th>
                <th>Name</th>
                <th>Email</th>
                <th>Location</th>
            </tr>
            <?php
            while($row = mysqli_fetch_array($result)) { ?>
            <tr>
                <td><?php echo $row['id']; ?></td>
                <td contenteditable="true" onfocus="changeBackground(this);" onblur="saveData(this, '<?php echo $row["id"]; ?>', 'name');"><?php echo $row['name']; ?></td>
                <td contenteditable="true" onfocus="changeBackground(this);" onblur="saveData(this, '<?php echo $row["id"]; ?>', 'email');"><?php echo $row['email']; ?></td>
                <td contenteditable="true" onfocus="changeBackground(this);" onblur="saveData(this, '<?php echo $row["id"]; ?>', 'location');"><?php echo $row['location']; ?></td>
            </tr>
            <?php } ?>
        </table>
    </div>
    <script src="js/jquery-1.10.2.js"></script>
    <script type="text/javascript">
    function changeBackground(obj) {
        $(obj).removeClass("bg-success");
        $(obj).addClass("bg-danger");
    }

    function saveData(obj, id, column) {
        var customer = {
            id: id,
            column: column,
            value: obj.innerHTML
        }
        $.ajax({
            type: "POST",
            url: "savecustomer.php",
            data: customer,
            dataType: 'json',
            success: function(data){
                if (data) {
                    $(obj).removeClass("bg-danger");
                    $(obj).addClass("bg-success");
                }
            }
       });
    }
    </script>
</body>
</html>

STEP-7) Save Edited Data into MySQL Database

Finally, we need to store the data edited by the user on the database. Here is the php code to do it.

savecustomer.php

<?php
include_once "dbconnect.php";

$sql = "update customers set " . $_POST["column"] . "='" . $_POST["value"] . "' where id=" . $_POST["id"];
if (mysqli_query($con, $sql))
    echo "true";
else
    echo "false";
?>

Done! Now we have all the necessary files in place. Run index.php and you will see a nice table that lists the records from the database. Edit some table cells and the cell color will change to red during editing.

php mysql inline editing ajax

Once you finish editing, the table cell turns green as soon as it lost focus.

inline editing php mysql jquery ajax

Refresh the page and the data you have modified will remain there. It means that we have saved the edited data on the database successfully.

Read Also:

That explains about inline editing using php, mysql and ajax. Inline editing will enhance user experience and also save you from creating multiple web forms. You can apply the technique with any html element. I hope you like this tutorial. Please don't forget to share it on social media. Good day!!!

Twitter Bootstrap Inline Form Example

On 12/08/2017 4 Comments so far

Hi, this is another one of those quick twitter bootstrap tutorials which shows you how to create inline form using bootstrap css. As said many times, using bootstrap simplifies the task of building websites, especially web forms. Web Forms or otherwise called as HTML Forms are the inherent part of web development and a simple modern day website should include a contact form at the least. But to style those forms with css is a tedious task and using twitter bootstrap framework greatly simplifies it.

twitter bootstrap inline form example

Twitter Bootstrap Inline Form Layout

HTML Forms can be laid out in different ways but at times you may have to make it packed in little available space, like having a login form in top navigation menu. This type of layout is called as 'inline form layout' and there is a separate class named '.form-inline' is available in bootstrap css.

Using this css class along with the html <form> tag will automatically align the form elements side-by-side to create a compact looking form.

Example for Inline Form in Bootstrap

Let's take login form as example and see how to create a simple inline form in bootstrap. This inline login form should contain two input fields for 'username' and 'password' and one submit button.

Below is the html markup for creating this inline form.

<div class="col-md-6 well">
    <form id="loginform" class="form-inline" role="form">
        <div class="form-group">
            <label for="email" class="sr-only">Email</label>
            <input type="email" id="email" placeholder="Email" class="form-control" />
        </div>
        <div class="form-group">
            <label for="password" class="sr-only">Password</label>
            <input type="password" id="password" placeholder="Password" class="form-control" />
        </div>
        <button type="submit" class="btn btn-success">Login</button>
    </form>
</div>

The above html code will get you a compact looking inline login form like this,

twitter bootstrap inline login form example
Inline Login Form in Bootstrap

As you can see all the three form elements are aligned side by side. Generally it is recommended to label all the form elements, but in case of inline form layout we can hide the label using '.sr-only' class. Instead we can use the HTML5 placeholder attribute to let the user to key-in proper input.

How to Add Inline Login Form to Twitter Bootstrap Navigation Menu

Well! If you want to place this same login form in the top navigation menu, add the form inside <nav> element and use the '.navbar-form' class.

Here is the html markup for doing it.

<nav class="navbar navbar-inverse" role="navigation">
    <div class="container-fluid">
        <div class="navbar-header">
            <button type="button" class="navbar-toggle" data-toggle="collapse" data-target="#topnavbar">
                <span class="sr-only">Toggle navigation</span>
                <span class="icon-bar"></span>
                <span class="icon-bar"></span>
                <span class="icon-bar"></span>
            </button>
            <a class="navbar-brand" href="#">PlayZone</a>
        </div>
        <div class="collapse navbar-collapse" id="topnavbar">
            <ul class="nav navbar-nav">
                <li class="active"><a href="#">Just Born</a></li>
                <li><a href="#">Toddlers</a></li>
                <li><a href="#">Below 12</a></li>
            </ul>
            
            <!-- login form -->
            <form class="navbar-form navbar-right form-inline" id="loginform" role="form">
                <div class="form-group">
                    <label for="email" class="sr-only">Email</label>
                    <input type="email" id="email" placeholder="Email" class="form-control" />
                </div>
                <div class="form-group">
                    <label for="password" class="sr-only">Password</label>
                    <input type="password" id="password" placeholder="Password" class="form-control" />
                </div>
                <button type="submit" class="btn btn-success">Login</button>
            </form>
        </div>
    </div>
</nav>

The above markup will get you a navigation menu with inline login form like this,

inline login form in twitter bootstrap navbar
Inline Login Form in Bootstrap Navigation Menu

And that was all about creating inline forms in twitter bootstrap.

Also Read: How to Add Dropdown Menu and Search Form to Twitter Bootstrap Navigation Menu

Don't Miss: How to Create a Working Contact Form in Twitter Bootstrap using PHP

Learn more about bootstrap css in our twitter bootstrap tutorials section.

HTML5 Video Player with Custom Controls using JavaScript

On 12/04/2017 Be the first to comment!

Hi! Today let's see how to build html5 video player with custom controls using javascript. The only way to embed videos on webpages before the introduction of html5 is through the use of add-ons such as flash. But thanks to html5, you can insert video contents using native html markup alone. The <video> </video> element in html5 offers a standard way to include video files on web pages. It is supported by all html5 compatible browsers.

Currently, HTML5 supports three types of video formats and they are MP4, WebM, and Ogg. Among the three, MP4 is compatible with all major browsers.

html5 video player custom controls javascript

Creating Video Player in HTML5:

To embed video in an html page, use the <video> element like this,

<video width="640" height="360" controls>
    <source src="videos/flying-seagull.mp4" type="video/mp4">
    <source src="videos/flying-seagull.ogg" type="video/ogg">
    Your browser does not support HTML5 Videos.
</video>
  • You can provide multiple video sources using the <source> element. The browser will choose the first supported format.
  • The attributes 'width' and 'height' defines the width and height of the video. Providing these values will prevent possible flicker at the time of loading.
  • The 'controls' attribute adds the default media controls, such as play, pause, volume slider, fullscreen, etc. to the video player.
  • Older versions of browsers doesn't support html5, in which case, the text added between the <video> </video> tags will be displayed.

Autoplay Videos:

The 'autoplay' attribute will start the video automatically. Including it, the video will be played automatically on page load.

<video width="640" height="360" controls autoplay>
    <source src="videos/flying-seagull.mp4" type="video/mp4">
    Your browser does not support HTML5 Videos.
</video>

Building Custom Controls to HTML5 Video Player:

Okay. Now let's build some custom controls to the video player in HTML5. If you wonder why we need custom controls at all when the player itself provide default ones. The primary reason is that the default controls depend entirely on the browser and may vary from one browser to another. Therefore, building a common user interface will make the player look the same across different browsers

HTML5 provides several DOM properties, methods, and events for the <video> element. You can use them to define custom video controls. Below I have created markup for video player with controls to play, pause, replay, stop, volume up/down and mute videos.

HTML Markup:

<div id="container">
    <h1>Custom HTML5 Video Player</h1>
    <div id="player-container">
        <video id="myplayer" width="640" height="360">
            <source src="videos/flying-seagull.mp4" type="video/mp4">
            Your browser does not support HTML5 Video.
        </video>
        <div id="controls">
            <button onclick="playPause()">Play/Pause</button>
            <button onclick="stopVideo()">Stop</button>
            <button onclick="replayVideo()">Replay</button>
            <button onclick="increaseVolume()">Volume (+)</button>
            <button onclick="decreaseVolume()">Volume (-)</button>
            <button onclick="muteVolume()">Mute/Unmute</button>
        </div>
    </div>
</div>

Style the Player with CSS:

Next, add some css styles to make the player look good.

<style type="text/css">
#container {
    margin: 0 auto;
    width: 666px;
    text-align: center;
}

#player-container {
    margin: 0 auto;
    background-color:black;
    padding-top: 10px;
    padding-bottom: 10px;
    border: 3px solid #4CC1BE;
    border-radius: 7px;
}

#controls {
    margin-top: 6px;
}
</style>

The demo uses only simple buttons but, it's up to you to style them with images. Using bootstrap glyphicons or icon fonts like font-awesome is better suited. You can scale them according to your liking.

JavaScript for Custom Controls:

Finally we have to bind the events of the buttons to javascript functions. Below I have added separate js function for each button event.

<script type="text/javascript">
var player = document.getElementById("myplayer");

function playPause() {
    if (player.paused)
        player.play();
    else
        player.pause();
}

function stopVideo() {
    player.pause();
    if (player.currentTime) {
        player.currentTime = 0;
    }
}

function replayVideo() {
    player.currentTime = 0;
      player.play();
}

function increaseVolume() {
    if (player.volume < 1)
        player.volume = parseFloat(player.volume + 0.1).toFixed(1);
}

function decreaseVolume() {
    if (player.volume > 0)
        player.volume = parseFloat(player.volume - 0.1).toFixed(1);
}

function muteVolume() {
    if (player.muted)
        player.muted = false;
    else
        player.muted = true;
}
</script>

That's it. We have everything in place. Now run the file and you can see a nice html5 video player with custom control buttons at the bottom.

html5 video player controls

Please note that, the demo is just the place to start with. You can build a much more enhanced video player using the DOM properties of HTML5 video element.

Read Also:

That explains about building an html5 video player with custom controls. With the help of javascript and some css, you can build a robust video player with an attractive user interface. I hope you like this tutorial. Will meet you in another interesting one. Please don't forget to share this post on your social networks.

Create Editable Table in HTML5, Bootstrap and jQuery

On 12/01/2017 Be the first to comment!

Hi! Today we are going to see an interesting tutorial which is about creating editable table in html5, bootstrap and jquery. Usually, any form of organized data will be presented in as table or lists on web pages. But those tables cannot be edited by users. We can say HTML Tables are non-editable and you need the help of complex jquery plug-ins to make them editable. But thanks to HTML5, you can now easily create editable tables on the fly, without any complex coding or add-ons.

HTML5 is just enough to create an editable table, but to make this demo interesting, I'm going to use bootstrap and jquery along with it. Come, let's see how to apply inline editable option to html table element.

HTML5 Editable Table:

HTML5 has an attribute called 'contenteditable'. Setting this attribute to 'true', will make the table cell editable. You simply have to add the attribute to <td> like this,

<table>
    <tr>
        <td contenteditable="true"></td>
        <td contenteditable="true"></td>
    <tr>
</table>

This attribute can be used on any html elements such as <div>, <p>, <td> etc and enable inline editing on those elements.

Creating Editable Table in HTML5 and Bootstrap:

Let's see a demo, where we have this html table with each cell being editable. There would also be an option for the user to add a new row to the table and delete the rows from it.

For the demo I'm going to use,

  1. HTML5 - To create the editable table
  2. Bootstrap CSS - To make the table visually appealing
  3. jQuery - To perform user actions on the table like adding row, deleting row etc.

First let's write the markup for the table.

HTML Markup:

<div id="mytable">
    <table class="table table-bordered">
        <tr>
            <th>First Name</th>
            <th>Last Name</th>
            <th>Position</th>
            <th><span class="add-row glyphicon glyphicon-plus"></span></th>
        </tr>
        <tr>
            <td contenteditable="true">Kim</td>
            <td contenteditable="true">Bell</td>
            <td contenteditable="true">Senior Analyst</td>
            <td><span class="delete-row glyphicon glyphicon-remove"></span></td>
        </tr>
        <tr>
            <td contenteditable="true">Laurence</td>
            <td contenteditable="true">Peter</td>
            <td contenteditable="true">Technical Assistant</td>
            <td><span class="delete-row glyphicon glyphicon-remove"></span></td>
        </tr>
        <tr>
            <td contenteditable="true">Joe</td>
            <td contenteditable="true">Franklin</td>
            <td contenteditable="true">Accountant</td>
            <td><span class="delete-row glyphicon glyphicon-remove"></span></td>
        </tr>
        <!-- hidden row -->
        <tr class="hidden">
            <td contenteditable="true">NIL</td>
            <td contenteditable="true">NIL</td>
            <td contenteditable="true">NIL</td>
            <td><span class="delete-row glyphicon glyphicon-remove"></span></td>
        </tr>
    </table>
</div>

Above, we have created a html table with three rows of data by default. There is a Plus sign ('+') in the upper right corner of the table header for adding rows, and a 'x' mark at the end of each row indicating the option to delete rows. We have also set the contenteditable="true" for each 'td' element which makes inline editing of the cell possible.

Towards the end, there is a hidden row which will be used to clone and add a new row at the end of the table when user cliks on the '+' icon.

CSS Styles:

Next let's add some css styles so that the table looks attractive.

<style type="text/css">
#mytable {
    margin: 0 auto;
    width: 60%;
    position: relative;
}

.glyphicon {
    font-size: 20px;
}

.add-row {
    color: #32CD32;
}

.add-row:hover {
    color: #228B22;
}

.delete-row {
    color: #FF0000;
}

.delete-row:hover {
    color: #B22222;
}
</style>

Adding jQuery Script:

Finally, we need to write the jquery script to make the table respond to the user actions. Let's add two functions, one to add and the other to remove the row.

<script type="text/javascript">
$(document).ready(function() {
    // function to add row
    $('.add-row').click(function () {
        var $row = $('#mytable').find('tr.hidden').clone(true).removeClass('hidden');
        $('#mytable').find('table').append($row);
    });

    // function to remove row
    $('.delete-row').click(function () {
        $(this).parents('tr').detach();
    });
});
</script>

The first function is for adding new rows to the table. When the user clicks on the green '+' icon, the script will look for the hidden row in the table markup, duplicate it and append it to the end of the table.

Likewise, when the user clicks on red 'x' icon, the second function will delete the specific row from the table.

html5 editable table bootstrap jquery
Inline Editing in HTML5 Table

Here is the Complete Script for the Demo:

<!DOCTYPE html>
<html>
<head>
    <title>Editable table in HTML5</title>
    <meta charset="utf-8"> 
    <meta content="width=device-width, initial-scale=1.0" name="viewport" >
    <link rel="stylesheet" href="css/bootstrap.css" type="text/css" />
    <style type="text/css">
    #mytable {
        margin: 0 auto;
        width: 60%;
        position: relative;
    }

    .glyphicon {
        font-size: 20px;
    }

    .add-row {
        color: #32CD32;
    }

    .add-row:hover {
        color: #228B22;
    }

    .delete-row {
        color: #FF0000;
    }

    .delete-row:hover {
        color: #B22222;
    }
    </style>
</head>
<body>
<div id="mytable">
    <table class="table table-bordered">
        <tr>
            <th>First Name</th>
            <th>Last Name</th>
            <th>Position</th>
            <th><span class="add-row glyphicon glyphicon-plus"></span></th>
        </tr>
        <tr>
            <td contenteditable="true">Kim</td>
            <td contenteditable="true">Bell</td>
            <td contenteditable="true">Senior Analyst</td>
            <td><span class="delete-row glyphicon glyphicon-remove"></span></td>
        </tr>
        <tr>
            <td contenteditable="true">Laurence</td>
            <td contenteditable="true">Peter</td>
            <td contenteditable="true">Technical Assistant</td>
            <td><span class="delete-row glyphicon glyphicon-remove"></span></td>
        </tr>
        <tr>
            <td contenteditable="true">Joe</td>
            <td contenteditable="true">Franklin</td>
            <td contenteditable="true">Accountant</td>
            <td><span class="delete-row glyphicon glyphicon-remove"></span></td>
        </tr>
        <!-- hidden row -->
        <tr class="hidden">
            <td contenteditable="true">NIL</td>
            <td contenteditable="true">NIL</td>
            <td contenteditable="true">NIL</td>
            <td><span class="delete-row glyphicon glyphicon-remove"></span></td>
        </tr>
    </table>
</div>
<script src="js/jquery-1.10.2.js"></script>
<script type="text/javascript">
$(document).ready(function() {
    // function to add row
    $('.add-row').click(function () {
        var $row = $('#mytable').find('tr.hidden').clone(true).removeClass('hidden');
        $('#mytable').find('table').append($row);
    });

    // function to remove row
    $('.delete-row').click(function () {
        $(this).parents('tr').detach();
    });
});
</script>
</body>
</html>
Read Also:

That explains about creating editable table with html5 and bootstrap. Though inline text editing is a cool feature, the data on the table will be gone once the page is refreshed or redirected. So, we need to use some kind of back-end logic such as php or ajax to save the user edited data. I hope you like this tutorial. Kindly share this post on your social circle. Good Day!!!

How to Add Photo Frame Effect to Images using Pure CSS

On 12/01/2017 Be the first to comment!

Turn your plain website/blog images into an eye candy thing. CSS can be used to apply stylish image effects. Here is a pure CSS trick to apply photo frame effect to images. No need to completely rely on Photoshop to enhance the appearance of images anymore.

Here are the advantages of using css for image effects:

  1. There is no need for any image processing software.
  2. No image customization required. This CSS style can be used to any image irrespective of its size and type.
  3. Don't want to worry about positioning the images; and it maintains the image aspect ratio.
  4. The CSS styles can be tweaked later to suit your needs without bothering the html pages.

css image effects-photo frame effect

How to Create Photo Frame Effect with CSS?

To pull off the photo frame image effect, we just wrap our <img> tag inside a <div> block. Add a background texture image using "background" property to serve as a photo frame. To make it realistic, we add some "box-shadow" which makes the edges to look like a real photo frame. Now set the width alone to the <div> and <img> to maintain the image aspect ratio*. Center the image both horizontally and vertically inside the div. Now we are done. Wait! Wait. To boost up the beauty of the image, we round the corner of both the <div> and <img> tags. That's it.

Recommended Read: How to add a semi-transparent color layered text over an image using pure CSS

Recommended Read: How to Create Round Social Media icon style buttons using CSS

The resulting image will look like either rectangle or square based on the image width and height.

*Aspect Ratio = Image-Width/Image-Height, and will be 1 for square image.

Create Square/Rectangle Photo Frame Effect

css image effects-square photo frame
Square/Rectangle Photo Frame Effect using CSS

To get this effect we add a flat border radius of 20 px to all the four corners of both <div> block and image.

HTML Markup
<div class="squareFrame">
     <img src="images/kitten.jpg" />
</div>
CSS Code
.squareFrame{
      background: url("images/floral.jpg");
      margin-left:auto;
      margin-right:auto;
      display:table-cell;
      position:relative;
      overflow:hidden;
      width:300px;
      box-shadow: inset 0 50px rgba(255,255,255,0.1),
             inset 2px -15px 30px rgba(0,0,0,0.4),
             2px 2px 5px rgba(0,0,0,0.3);
      padding: 25px;
      border-radius: 20px;
      -webkit-border-radius: 20px;
      -moz-border-radius: 20px;
      vertical-align: middle;
      text-align:center;
}

.squareFrame img{
     width: 300px;
     border-radius: 20px;
     -webkit-border-radius: 20px;
     -moz-border-radius: 20px;
}

Create Round/Oval Photo Frame Effect

css image effects-round photo frame
Round/Oval Photo Frame Effect using CSS

In order to make the frame completely rounded, we set the border radius to 50%. If we use square image we get a perfect round else get an oval shaped frame effect.

HTML Markup

There is not much difference in html except the class name.

<div class="roundFrame">
     <img src="images/kitten.jpg" />
</div>
CSS Code
.roundFrame{
     background: url("images/floral.jpg");
     margin-left:auto;
     margin-right:auto;
     display:table-cell;
     position:relative;
     overflow:hidden;
     width:300px;
     box-shadow: inset 0 50px rgba(255,255,255,0.1),
           inset 2px -15px 30px rgba(0,0,0,0.4),
           2px 2px 5px rgba(0,0,0,0.3);
     padding: 25px;
     border-radius: 50%;
     -webkit-border-radius: 50%;
     -moz-border-radius: 50%;
     vertical-align: middle;
     text-align:center;
}

.roundFrame img{
     width: 300px;
     border-radius: 50%;
    -webkit-border-radius: 50%;
    -moz-border-radius: 50%;
}

Note: Please note that the image border radius is not supported by older versions of browsers and in that case just make the div's "border-radius" to minimum or just use the image as a background for <div> block using "background" property.

Recommended Read: How to add Stunning 3D CSS Photo Frame Effect to Images

Recommended Read: Create a stylish Horizontal Menu Bar with HTML and CSS

Conclusion

I have implemented the styles as CSS class which will be easier to apply for multiple images. All you have to do is just copy paste the above code and give a novelty look to your website/blogs. Want to learn more tricks like this? Then subscribe to our RSS feed. Finally, if you find this post useful, please kindly share it in your circle :).

Contact Form

Name

Email *

Message *