Showing posts with label AJAX. Show all posts

How to Send AJAX Request at Regular Interval

On 3/15/2018 Be the first to comment!

At times, you may want to update part of a web page repeatedly. Let's say, for example, that you have a website flashing live news or a cricket score update. Here you have to refresh that specific content on a regular basis and ajax is the best way to do it.

You are left with two options when you want to fire ajax request at specific time interval - one is setInterval() and the other is setTimeout() function. Both JavaScript functions are good for doing periodic tasks, but one is much better than the other. In this tutorial we will see what is the best approach and how.

send ajax request at regular interval

Fire Continuous AJAX Request using setInterval():

The setInterval() is the common method used for repeated tasks. It executes a function at specified interval in milliseconds. Repeated calls can only be stopped using the clearInterval() method or by closing the window.

setInterval(function, milliseconds);

Consider the following example. This java script will fire ajax call every 5 seconds to the server and update the news feed.

<script type="text/javascript">
function getFeed() {
    $.ajax({
        url: 'get_news_feed.php',
        type: 'POST',
        success: function(data) {
            $('#result').html(data);
        }
    });
}

$(document).ready(function() {
    setInterval(getFeed, 5000);
});
</script>

At first glance, the script may look fine but it's not. It continuously executes the getFeed() function regardless of whether the previous ajax request is completed or not.

Let's say you are on a slower network, and the first request was not completed, but you start another one. Soon you would end up in a situation where multiple requests are stacked up that consume shared resources and delay each other.

To avoid this problem, you can use the setTimeout() method that allows you to wait until the last request is completed before sending the next one.

Using setTimeout() Method:

The setTimeout() calls a function after the specified delay. Unlike the previous method, it executes the function only once. You have to call again to repeat the execution.

setTimeout(function, milliseconds);
It's best to use setTimeout() method instead of setInterval() for tasks that take longer than the repetition time interval.

Below is an example for its usage.

<script type="text/javascript">
function getFeed() {
    $.ajax({
        url: 'get_news_feed.php',
        type: 'POST',
        success: function(data) {
            $('#result').html(data);
        },
        complete:function(data) {
            setTimeout(getFeed, 5000);
        }
    });
}

$(document).ready(function() {
    setTimeout(getFeed, 5000);
});
</script>

The above script send ajax request after waiting for 5 seconds. Upon successful completion, the next one will be fired. Here we have used the complete callback to verify if the previous request was executed successfully or not.

As you can see, the second example is much better than the first. It simply waits for the first ajax call to finish before sending the second one. So even if there is a delay for server response, multiple requests won't be queued.

Also Read:

We have seen two ways to send an ajax call at specific time interval. And the post also explains why it is better to use setTimeout for repetitive task. I hope this post is useful for you. Please share it on social media if you like it.

AJAX Pagination in CodeIgniter Tutorial

On 3/09/2018 Be the first to comment!

Hi! In this post, we will see how to make ajax pagination in codeigniter using codeigniter pagination library. The Pagination class offers feature rich functions to paginate the query results in view. Although the usage of pagination library is well-documented, paginating the results with jquery ajax is somewhat a mystery. The solutions available around the web are too complicated for beginners. Hence I decided to write a tutorial on the topic that is easy enough for anyone to implement codeigniter pagination with ajax.

For this example, we'll need two libraries which are jQuery and Bootstrap. The jQuery.js is for making ajax call and bootstrap is for designing the user interface.

ajax pagination codeigniter tutorial

CodeIgniter AJAX Pagination Example:

To create ajax pagination, I'm going to use the default pagination library of the code igniter framework. Simply follow the below steps to implement the same.

STEP-1) Create Database

First create the required database, table and the records to use in our example. I'm going to use MySQL here. Just run the following sql queries in mysql and it will take care of DB creation.

CREATE DATABASE `my_demo`;
USE `my_demo`;

CREATE TABLE IF NOT EXISTS `Employees` (
  `EmpID` int(8) NOT NULL AUTO_INCREMENT,
  `EmpName` varchar(50) NOT NULL,
  `DeptName` varchar(30) NOT NULL,
  `Designation` varchar(25) NOT NULL,
  `DOJ` date NOT NULL,
  `Salary` int(10) NOT NULL,
  PRIMARY KEY (`EmpID`)
) ENGINE=MyISAM  DEFAULT CHARSET=latin1 AUTO_INCREMENT=9 ;

INSERT INTO `Employees` (`EmpID`, `EmpName`, `DeptName`, `Designation`, `DOJ`, `Salary`) VALUES
(1, 'Colleen Hurst', 'HQ', 'Regional Director', '2009-09-15', 205500),
(2, 'Brielle Williamson', 'Software', 'Integration Specialist', '2012-12-02', 372000),
(3, 'Garrett Winters', 'Finance', 'Accountant', '2011-07-25', 170750),
(4, 'Caesar Vance', 'Sales', 'Assistant Manager', '2011-12-12', 106450),
(5, 'Sonya Frost', 'Software', 'Software Engineer', '2008-12-13', 133600),
(6, 'Herrod Chandler', 'Sales', 'Sales Executive', '2012-08-06', 127500),
(7, 'Jena Gaines', 'HQ', 'Manager', '2008-12-19', 112560),
(8, 'Quinn Flynn', 'Software', 'Support Lead', '2013-03-03', 342000);

STEP-2) Create Model

Next, create the codeigniter model to handle database requests. Place this file inside 'application' > 'models' folder. The file contains getEmployees() function to fetch a portion of employees records from the database using the limit condition.

AjaxPaginationModel.php
<?php
class AjaxPaginationModel extends CI_Model {
    function __construct() {
        // Call the Model constructor
        parent::__construct();
    }

    function getEmployees($limit, $start) {
        $query = $this->db->get('Employees', $limit, $start);
        return $query->result();
    }
}
?>

STEP-3) Create Controller

Next we need a controller file to regulate the interaction between the front-end and the back-end. Create this file inside 'application' > 'controllers' folder.

It contains the default index() function which creates paging links and obtain the employee records from the model function and passes them to the view file.

AjaxPaginationController.php
<?php
class AjaxPaginationController extends CI_Controller {
    function __construct() {
        parent::__construct();
        $this->load->helper('url');
        $this->load->database();
        $this->load->library('pagination');
        $this->load->model('AjaxPaginationModel');
    }

    function index() {
        //pagination settings
        $config['base_url'] = site_url('AjaxPaginationController/index');
        $config['total_rows'] = $this->db->count_all('Employees');
        $config['per_page'] = '5';
        $config['uri_segment'] = 3;
        $choice = $config['total_rows'] / $config['per_page'];
        $config['num_links'] = floor($choice);
        $this->pagination->initialize($config);

        $data['page'] = ($this->uri->segment(3)) ? $this->uri->segment(3) : 0;

        // fetch employees list
        $data['results'] = $this->AjaxPaginationModel->getEmployees($config['per_page'], $data['page']);       
        // create pagination links
        $data['links'] = $this->pagination->create_links();

        if($this->input->post('ajax')) {
            $this->load->view('Data', $data);
        } else {
            $this->load->view('AjaxPaginationView', $data);
        }
    }
}
?>

STEP-4) Create View

Finally we need to create the view file. This is the user interface where the results from the database will be displayed in a neatly organized table along with pagination links at the bottom.

Please note that to keep this tutorial simple, I haven't styled the pagination links. You can check here to apply bootstrap styles to codeigniter pagination links.

The special thing about the view is that we have split it into two files. One is the main view named 'AjaxPaginationView.php' and the other 'Data.php' that contains the markup to display the ajax data.

AjaxPaginationView.php
<!DOCTYPE html>
<html>
<head>
    <meta charset="utf-8">
    <meta content="width=device-width, initial-scale=1.0" name="viewport">
    <title>CodeIgniter Pagination with AJAX Example</title>
    <link href="https://maxcdn.bootstrapcdn.com/bootstrap/3.3.7/css/bootstrap.min.css" type="text/css" rel="stylesheet" />
</head>
<body>
    <div class="container">
        <div class="row">
            <h3 class="text-center bg-success">AJAX Pagination in CodeIgniter</h3>
            <div id="ajax_content">
                <?php $this->load->view('Data', $results); ?>
            </div>
        </div>
    </div>
    <script src="https://code.jquery.com/jquery-2.1.1.min.js" type="text/javascript"></script>
    <script type="text/javascript">
    $(function() {
        paginate();
        function paginate() {
            $('#ajax_links a').click(function() {
                var url = $(this).attr('href');
                $.ajax({
                    url: url,
                    type: 'POST',
                    data: 'ajax=true',
                    success: function(data) {
                        $('#ajax_content').html(data);
                    }
                });
                return false;
            });
        }
    });
</script>
</body>
</html>
Data.php
<table class="table table-striped table-hover">
    <thead>
        <tr>
        <th>#</th>
        <th>Emp Name</th>
        <th>Department</th>
        <th>Designation</th>
        <th>Joining Date</th>
        <th>Salary</th>
        </tr>
    </thead>
    <tbody>
    <?php for ($i = 0; $i < count($results); ++$i) { ?>
    <tr>
        <td><?php echo ($page+$i+1); ?></td>
        <td><?php echo $results[$i]->EmpName; ?></td>
        <td><?php echo $results[$i]->DeptName; ?></td>
        <td><?php echo $results[$i]->Designation; ?></td>
        <td><?php echo $results[$i]->DOJ; ?></td>
        <td><?php echo $results[$i]->Salary; ?></td>
    </tr>
    <?php } ?>
    </tbody>
</table>
<div id="ajax_links" class="text-center">
    <?php echo $links; ?>
</div>

In the view file, we have included the java script function to make ajax call and update the data received on the view container.

codeigniter ajax pagination example
Read Also:

Likewise, you can create ajax pagination in codeigniter using the regular pagination class itself. You can also try the 'Ajax Pagination' library offered in the code igniter site. The entire concept is simple and easy to implement. I hope you find this tutorial useful. Please share it on social media if you like it.

CodeIgniter Autocomplete Search from Database using AJAX Example

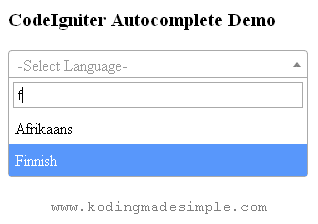
On 2/09/2018 3 Comments so far

Hi! In this post, let's see how to autocomplete search from database using codeigniter and ajax. We are going to pull in live search thing something similar to Google search. As soon as you start typing in the textbox, the related suggestions will appear from the database. To implement this auto complete feature we need a jquery plugin called 'Select2'.

Select2 is an excellent plug-in that supercharges the regular select box with search functionality. It's really inappropriate to make the end user to skim through hundreds of options to pick just one. With Select2 the entire process is a breeze. It adds up a search filter to the dropdown (select box), thus populating results on fly with the help of ajax.

codeigniter autocomplete search from database ajax

AJAX Autocomplete Search from Database in CodeIgniter:

To implement the live autocomplete search in codeigniter, we need two JavaScript libraries, 1. jquery.js and 2. select2.js. Either download them or use from the cdn library just like I do in this demo.

Just follow the below steps and you'll be good.

Step-1) Create Database

For database, I'm going to use MySQL here. Create a dummy database, a table and some records to use in the example. Below is a sql file. Run the queries on mysql and it will take care of database creation.

CREATE `db_demo`;
USE `db_demo`;
CREATE TABLE IF NOT EXISTS `tbl_language` (
  `id` int(9) NOT NULL AUTO_INCREMENT,
  `lname` varchar(50) NOT NULL,
  `lcode` varchar(2) NOT NULL,
  PRIMARY KEY (`id`)
) ENGINE=MyISAM  DEFAULT CHARSET=latin1 AUTO_INCREMENT=6;

INSERT INTO `tbl_language` (`id`, `lname`, `lcode`) VALUES
(1, 'English', 'en'),
(2, 'Afrikaans', 'af'),
(3, 'Greek', 'el'),
(4, 'Finnish', 'fi'),
(5, 'Spanish', 'es');

Step-2) Create Model

We need a codeigniter model to handle the database transactions. So create a model file inside 'application' > 'models' folder. It contains the function getLanguage() to fetch language names from the database that match the search term entered by the user.

SearchModel.php

<?php
class SearchModel extends CI_Model
{
    function __construct()
    {
        parent::__construct();
    }
    
    function getLanguage($str)
    {
        $this->db->select('id, lname as text');
        $this->db->like('lname', $str);
        $query = $this->db->get('tbl_language');
        return $query->result();
    }
}
?>

Step-3) Create Controller

Next create a controller file inside 'application' > 'controllers' folder. It contains two functions,

  1. index() - this is the default method that just loads the view file.
  2. search() - This function will be triggered during the ajax call. It receives the incoming search term ('q'), communicate with the model and get the results matching the search term, encode them to json and pass it back to the browser.

SearchController.php

<?php
class SearchController extends CI_Controller {
    function __construct()
    {
        parent::__construct();
        $this->load->helper('url');
        $this->load->database();
    }

    function index()
    {
        $this->load->view('SearchView');
    }
    
    function search()
    {
        $q = $this->input->get('q');
        $this->load->model('SearchModel');
        echo json_encode($this->SearchModel->getLanguage($q));
    }
}
?>

Step-4) Create View

This is the final step. Create a view file inside 'application' > 'views' folder. It contains all the front-end logic, including html markup, css and java script. Here is where we need to fire the ajax call. Just load the js libraries and bind the select2() method to the dropdown that requires auto complete feature.

SearchView.php

<!DOCTYPE html>
<html>
<head>
    <title>CodeIgniter Search from Database Example</title>
    <link href="https://cdnjs.cloudflare.com/ajax/libs/select2/4.0.3/css/select2.min.css" rel="stylesheet" type="text/css" />
</head>
<body>
    <h3>CodeIgniter Autocomplete Demo</h3>
    <select id="language" name="language" class="itemName form-control" style="width:300px" ></select>

    <script src="https://code.jquery.com/jquery-2.1.1.min.js" type="text/javascript"></script>
    <script src="https://cdnjs.cloudflare.com/ajax/libs/select2/4.0.3/js/select2.min.js"></script>
    
    <script type="text/javascript">
    $('#language').select2({
        placeholder: '-Select Language-',
        minimumInputLength: 1,
        ajax: {
            url: "<?php echo base_url();?>index.php/SearchController/search",
            dataType: 'json',
            delay: 250,
            processResults: function (data) {
                return {
                    results: data
                };
            },
            cache: true
        }
    });
    </script>
</body>
</html>

That's it! We have everything in place. It's time to test the search filter. Just run the controller and if everything is okay, you'll see a drop-down box. Start typing in the textbox and you will see the suggestions popping up below in a list.

ajax autocomplete search select2

With the plug-in, you can not only pull in the results from the database, but from other sources such as a remote REST API or just a local JS array.

Read Also:

That explains about implementing search from database in codeigniter and ajax. Most modern web apps uses autocomplete search and is a sure fire way to increase user experience. Every little detail counts! So make sure you implement it on your next project. I hope this tutorial is useful for you. Please share it on your social circle if you like it.

Submit Form using jQuery AJAX and PHP without Page Refresh

On 12/28/2017 Be the first to comment!

Hi! In this tutorial we will see how to submit form using jquery ajax and php without page refresh. Web Development enhanced with AJAX increases speed and performance thereby improving the overall user experience. It allows you to update part of a web page without refreshing it completely. Basically, when you submit an html form, the entire page will be refreshed. But by using ajax technique, you can submit the form to the web server without having to reload the page. Instead, the form data will be submitted to the server in the background and can be processed in any way you want.

ajax submit form without page refresh using jquery and php

How to Submit Form using jQuery AJAX and PHP?

The jQuery library provides ajax() method which allows you to submit form without refreshing page. It will send an HTTP request to the web server (here is the php script), which is then processed by the server and sends an http response.

Let's see how to do it.

Step 1) Create a Basic HTML Form

First let's create a simple html form containing some input fields and a submit button.

<form id="myForm">
    <input type="text" name="name" placeholder="Enter your name" required />
    <input type="text" name="email" placeholder="Email ID" required />
    <input type="text" name="city" placeholder="City" required />
    <input type="submit" name="submit" value="Submit Form" />
</form>

Step 2) Add a Placeholder for Server Response

Add a div block next to the form. This will act as a placeholder to display the server response.

<div id="postData"></div>

Step 3) Load jQuery

We'll need jquery library to send ajax call. So load it after all the html components but just before the closing body tag.

<script src="js/jquery-1.10.2.js" type="text/javascript"></script>

Step 4) The AJAX Script

Now it's time to write the ajax script. Add the following script after loading 'jquery.js' file.

<script type="text/javascript">
$(document).ready(function(){
    $('#myForm').submit(function(e){
        e.preventDefault();
        $.ajax({
            url: "get_data.php",
            type: "POST",
            data: $(this).serialize(),
            success: function(data){
                $("#postData").html(data);
            },
            error: function(){
                alert("Form submission failed!");
            }
        });
    });
});
</script>

In the above JS, we have called ajax() function on form submission event. Using preventDefault() will cancel the original event and prevent the page from reloading.

There are several options that you can configure for the ajax() function and I have used some in the example. Here are the details of what they represent,

  • The url specifies the server script to which the http request should be sent.
  • The type defines the type of request to be sent. Here I set it as 'POST' to send HTTP POST request.
  • The data can be string or object and contain the form data.
  • The success function will be executed when the server responds true.
  • And the error function will be triggered if the request fails.

Complete Script: index.html

<html>
    <head>
        <title>AJAX Form Submit without Page Refresh</title>
    </head>
    <body>
    
    <form id="myForm">
        <input type="text" name="name" placeholder="Enter your name" required />
        <input type="text" name="email" placeholder="Email ID" required />
        <input type="text" name="city" placeholder="City" required />
        <input type="submit" name="submit" value="Submit Form" />
    </form>
    
    <div id="postData"></div>
    
    <script src="js/jquery-1.10.2.js" type="text/javascript"></script>
    <script type="text/javascript">
    $(document).ready(function(){
        $('#myForm').submit(function(e){
            e.preventDefault();
            $.ajax({
                url: "get_data.php",
                type: "POST",
                data: $(this).serialize(),
                success: function(data){
                    $("#postData").html(data);
                },
                error: function(){
                    alert("Form submission failed!");
                }
            });
        });
    });
    </script>
    </body>
</html>

Step 5) Server Script

Finally, you need the php script where the http request should be sent. It receives the submitted form data and you can process it like you want and send back the desired response using 'echo' command.

For this example I have simply encoded the $_POST array to json and sent back to the client, which will then be displayed in the #postData div block we have created in step 2.

get_data.php

<?php
echo json_encode($_POST);
?>

Done! We have the client and server script in place. Now you can run index.html and fill up the form with details and click on 'Submit Form'. You can see that the data you have supplied will be displayed as json string in the web page without the page being refreshed.

Read Also:

Likewise you can submit form without page refresh using ajax and php. Instead of ajax() you can use the jquery's post() method to send http request. We can see about that in some other tutorial later. I hope you find it useful. Please don't forget to share it in social media if you like.

jQuery Datatables with PHP, MySQL and AJAX Example

On 12/25/2017 2 Comments so far

Hi! In this tutorial let's look at the server-side processing of jquery datatables using php, mysql and ajax. In case you don't know, Datatables is an amazing jquery plugin that converts the simple html table into a feature-rich data grid with additional functions like instant search, pagination, multi-column sorting etc. The table works with multiple data sources like DOM, AJAX etc., and supports both client and server side processing. We have already seen about datatables with json data and here we will see about server side processing.

For the server script, we are going to use PHP and MySQL as a data source.

jQuery Datatables Server-side Processing with PHP and MySQL:

Let's see how to fetch records from the server-side using ajax request and list it in the data tables. To use in this example, we need a dummy database. So let's create it first.

Step 1) Create MySQL Database

The following sql will create a mysql database, a table and some sample records in it. Run this script on phpmyadmin to create the database.

CREATE DATABASE `my_demo`;
USE `my_demo`;

CREATE TABLE `customers` (
  `id` int(8) NOT NULL AUTO_INCREMENT,
  `name` varchar(50) NOT NULL,
  `email` varchar(60) NOT NULL,
  PRIMARY KEY (`id`)
) ENGINE=MyISAM  DEFAULT CHARSET=latin1 AUTO_INCREMENT=14 ;

INSERT INTO `customers` (`id`, `name`, `email`) VALUES
(1, 'Jim Connor', 'jimconnor@yahoo.com'),
(2, 'Mark Higgins', 'mark.higgins21@yahoo.com'),
(3, 'Austin Joseph', 'austin.joseph.boston@gmail.com'),
(4, 'Sean Kennedy', 'seankennedy01@gmail.com'),
(5, 'Rose Harris', 'roseharris@gmail.com'),
(6, 'Lilly Whites', 'lillywhites@outlook.com'),
(7, 'Jennifer Winters', 'jennie.winters001@gmail.com'),
(8, 'Michael Bruce', 'michaelbruce78@yahoo.com'),
(9, 'John Alex', 'johnalex@example.com'),
(10, 'Demi Milan', 'demimilan@gmail.com'),
(11, 'Austin Joseph', 'austin.joseph.boston@gmail.com'),
(12, 'Mark Higgins', 'mark.higgins21@yahoo.com'),
(13, 'Sean Kennedy', 'seankennedy.boss@outlook.com');

Step 2) Load the Required CSS and JS Libraries

Next load the CSS and JS files of the datatables plug-in. And you must also include the 'jquery.js' before loading 'jquery.datatables.js' since it is dependent on jquery.

<link rel="stylesheet" type="text/css" href="//cdn.datatables.net/1.10.12/css/jquery.dataTables.css">
<script src="https://ajax.googleapis.com/ajax/libs/jquery/2.1.3/jquery.min.js" type="text/javascript"></script>
<script src="//cdn.datatables.net/1.10.12/js/jquery.dataTables.js" charset="utf8" type="text/javascript"></script>
Please note that I have loaded the datatables files from the cdn but you can download and use it from your own server though.

Step 3) Create HTML Table

Then create html markup for the table. This will act as a placeholder for data table. Just add the appropriate column headers for the table.

<table id="customersTable" class="display" width="100%" cellspacing="0">
    <thead>
        <tr>
            <th>ID</th>
            <th>Name</th>
            <th>Email</th>
        </tr>
    </thead>
</table>

Step 4) AJAX Call

Next, make ajax request to the php script to get the data from the server-side. You must also map the table columns with the fields in the database to populate the html table.

$(document).ready(function() {
    $('#customersTable').dataTable({
        "processing": true,
        "ajax": "fetch_data.php",
        "columns": [
            {data: 'id'},
            {data: 'name'},
            {data: 'email'}
        ]
    });
});
The method dataTable() will initialize the datatables and comes with various options. By setting different parameters we can control the way it behaves.

Complete index.html File

<!DOCTYPE html>
<html>
<head>
    <title>Datatables Example using PHP and MySQL</title>
    <link rel="stylesheet" type="text/css" href="//cdn.datatables.net/1.10.12/css/jquery.dataTables.css">
</head>
<body>
    <h2 style="text-align:center;">Datatables Server-Side Example</h2>
    <table id="customersTable" class="display" width="100%" cellspacing="0">
        <thead>
            <tr>
                <th>ID</th>
                <th>Name</th>
                <th>Email</th>
            </tr>
        </thead>
    </table>
    
    <script src="https://ajax.googleapis.com/ajax/libs/jquery/2.1.3/jquery.min.js" type="text/javascript"></script>
    <script src="//cdn.datatables.net/1.10.12/js/jquery.dataTables.js" charset="utf8" type="text/javascript"></script>

    <script type="text/javascript">
    $(document).ready(function() {
        $('#customersTable').dataTable({
            "processing": true,
            "ajax": "fetch_data.php",
            "columns": [
                {data: 'id'},
                {data: 'name'},
                {data: 'email'}
            ]
        });
    });
    </script>
</body>
</html>

Step 5) Fetch Records from Database and Return as JSON

Finally the server script. This will communicate with the backend mysql database, retrieve records, encode it to json along with other necessary values and send it back to the front-end.

fetch_records.php

<?php
// db settings
$hostname = 'localhost';
$username = 'root';
$password = '';
$database = 'my_demo';

// db connection
$con = mysqli_connect($hostname, $username, $password, $database) or die("Error " . mysqli_error($con));

// fetch records
$sql = "select id, name, email from customers";
$result = mysqli_query($con, $sql);

while($row = mysqli_fetch_assoc($result)) {
    $array[] = $row;
}

$dataset = array(
    "echo" => 1,
    "totalrecords" => count($array),
    "totaldisplayrecords" => count($array),
    "data" => $array
);

echo json_encode($dataset);
?>

We have all the code in place. Now run the index.html and you can see data grid like this,

jquery datatables php mysql ajax

You can filter the records using the instant search box at the top this way,

jquery datatables server side processing php
Read Also:

That explains about displaying jquery datatables with database records using php and mysql. Although datatables works fairly well with client data sources such as json, JS Array etc., when you want to work with a huge data-set, going with server side processing is the best route. I hope this tutorial is useful for you. Please, share it in your social circle if you like it.

Inline Editing using PHP MySQL and jQuery AJAX

On 12/08/2017 Be the first to comment!

Hi! Today we will see about ajax inline editing using php and mysql. Inline editing allows users to rapidly modify web page contents in place without the requirement of forms. Popular sites like Facebook, Twitter, etc. employ this technique so that users can change their profile information without having to navigate through separate forms. Using HTML5's 'contenteditable' on page elements will take care of inline editing. For example, you can convert a plain html table into an editable table by setting 'contenteditable = true'.

If you are new to inline editing, take a look at html5 editable table tutorial.

PHP MySQL Inline Editing using jQuery AJAX:

The 'contenteditable' attribute can be used on almost all html elements, but the data edited by user is only temporary. It will be lost when the page is refreshed. Therefore, you must use ajax to send the data back to the server and store it in database for future use.

Here, let's see a demo with editable html table listing records from mysql table. Each time the user makes some changes, the edited data will be sent to the server through an ajax call and will be updated in the database using php.

During editing, the table cell will change to red background and to green when completed.

We'll need the following files for our demo,

  1. Bootstrap.css - To design the user interface
  2. jQuery.js - To post data to server via ajax
  3. dbconnect.php - Takes care of database connection
  4. index.php - Main user interface that contains html table, css and javascript functions.
  5. savecustomer.php - PHP script to update database table.

STEP-1) Create Database

First we need a mysql database and table to use in our example. Run this below sql file on mysql. It will create a database, a table and add some sample records in it.

CREATE DATABASE `mysite`;
USE `mysite`;

CREATE TABLE IF NOT EXISTS `customers` (
  `id` int(8) NOT NULL AUTO_INCREMENT,
  `name` varchar(50) NOT NULL,
  `email` varchar(60) NOT NULL,
  `location` varchar(50) NOT NULL,
  PRIMARY KEY (`id`)
) ENGINE=MyISAM  DEFAULT CHARSET=latin1 AUTO_INCREMENT=11 ;

INSERT INTO `customers` (`id`, `name`, `email`, `location`) VALUES
(1, 'Jim Connor', 'jimconnor@yahoo.com', 'Las Vegas'),
(2, 'Mark Higgins', 'mark.higgins21@yahoo.com', 'San Francisco'),
(3, 'Austin Joseph', 'austin.joseph.boston@gmail.com', 'Boston'),
(4, 'Sean Kennedy', 'seankennedy01@gmail.com', 'Seattle'),
(5, 'Rose Harris', 'roseharris@gmail.com', 'New York'),
(6, 'Lilly Whites', 'lillywhites@outlook.com', 'New York'),
(7, 'Jennifer Winters', 'jennie.winters001@gmail.com', 'Miami'),
(8, 'Michael Bruce', 'michaelbruce78@yahoo.com', 'Los Angeles'),
(9, 'John Alex', 'johnalex@example.com', 'Chicago'),
(10, 'Demi Milan', 'demimilan@gmail.com', 'Austin');

STEP-2) Open Database Connection

Next, we must establish the connection to database. The following script will open a php-mysql connection.

dbconnect.php

<?php
// connection settings
$hostname = 'localhost';
$username = 'root';
$password = '';
$database = 'mysite';

//connect to mysql database
$con = mysqli_connect($hostname, $username, $password, $database) or die("Error " . mysqli_error($con));
?>

STEP-3) Fetch Records from MySQL Table

Next fetch records from the mysql table we have created in step-1.

<?php
include_once 'dbconnect.php';

// fetch records
$sql = "select * from customers order by id";
$result = mysqli_query($con, $sql);
?>

STEP-4) Create HTML5 Editable Table

Then create an html5 table with inline editing enabled. And loop through the mysql resultset and display the records on the table one by one.

<div id="mytable">
    <h3 class="text-center bg-primary">AJAX Inline Editing HTML5 Table - Demo</h3>
    <table class="table table-bordered">
        <tr class="bg-primary">
            <th>ID</th>
            <th>Name</th>
            <th>Email</th>
            <th>Location</th>
        </tr>
        <?php
        while($row = mysqli_fetch_array($result)) { ?>
        <tr>
            <td><?php echo $row['id']; ?></td>
            <td contenteditable="true" onfocus="changeBackground(this);" onblur="saveData(this, '<?php echo $row["id"]; ?>', 'name');"><?php echo $row['name']; ?></td>
            <td contenteditable="true" onfocus="changeBackground(this);" onblur="saveData(this, '<?php echo $row["id"]; ?>', 'email');"><?php echo $row['email']; ?></td>
            <td contenteditable="true" onfocus="changeBackground(this);" onblur="saveData(this, '<?php echo $row["id"]; ?>', 'location');"><?php echo $row['location']; ?></td>
        </tr>
        <?php } ?>
    </table>
</div>

In the above markup, we have added two event functions for each cell in the table. One is to change the background color on focus and the other is to submit edited cell data to the server on blur event.

STEP-5) Change Table Cell Background On Focus

Now it's time to add javascript functions. First let's create the changeBackground() method which will change the background color of the cell to red when it gets focus.

function changeBackground(obj) {
    $(obj).removeClass("bg-success");
    $(obj).addClass("bg-danger");
}

STEP-6) Make AJAX Call to Server

Next is the ajax function saveData(). This function will post the edited data, record id and column name to the server as a json string. Once the database update is complete, the background color of the <td> element will change to green.

function saveData(obj, id, column) {
    var customer = {
        id: id,
        column: column,
        value: obj.innerHTML
    }
    $.ajax({
        type: "POST",
        url: "savecustomer.php",
        data: customer,
        dataType: 'json',
        success: function(data){
            if (data) {
                $(obj).removeClass("bg-danger");
                $(obj).addClass("bg-success");
            }
        }
   });
}

Following is the complete script for the index.php file.

index.php

<?php
include_once 'dbconnect.php';
// fetch records
$sql = "select * from customers order by id";
$result = mysqli_query($con, $sql);
?>

<!DOCTYPE html>
<html>
<head>
    <title>Inline Editing in PHP MySQL</title>
    <meta charset="utf-8"> 
    <meta content="width=device-width, initial-scale=1.0" name="viewport" >
    <link rel="stylesheet" href="css/bootstrap.css" type="text/css" />
    <style type="text/css">
    #mytable {
        margin: 0 auto;
        width: 60%;
    }
    </style>
</head>
<body>
<br/>
    <div id="mytable">
        <h3 class="text-center bg-primary">AJAX Inline Editing HTML5 Table - Demo</h3>
        <table class="table table-bordered">
            <tr class="bg-primary">
                <th>ID</th>
                <th>Name</th>
                <th>Email</th>
                <th>Location</th>
            </tr>
            <?php
            while($row = mysqli_fetch_array($result)) { ?>
            <tr>
                <td><?php echo $row['id']; ?></td>
                <td contenteditable="true" onfocus="changeBackground(this);" onblur="saveData(this, '<?php echo $row["id"]; ?>', 'name');"><?php echo $row['name']; ?></td>
                <td contenteditable="true" onfocus="changeBackground(this);" onblur="saveData(this, '<?php echo $row["id"]; ?>', 'email');"><?php echo $row['email']; ?></td>
                <td contenteditable="true" onfocus="changeBackground(this);" onblur="saveData(this, '<?php echo $row["id"]; ?>', 'location');"><?php echo $row['location']; ?></td>
            </tr>
            <?php } ?>
        </table>
    </div>
    <script src="js/jquery-1.10.2.js"></script>
    <script type="text/javascript">
    function changeBackground(obj) {
        $(obj).removeClass("bg-success");
        $(obj).addClass("bg-danger");
    }

    function saveData(obj, id, column) {
        var customer = {
            id: id,
            column: column,
            value: obj.innerHTML
        }
        $.ajax({
            type: "POST",
            url: "savecustomer.php",
            data: customer,
            dataType: 'json',
            success: function(data){
                if (data) {
                    $(obj).removeClass("bg-danger");
                    $(obj).addClass("bg-success");
                }
            }
       });
    }
    </script>
</body>
</html>

STEP-7) Save Edited Data into MySQL Database

Finally, we need to store the data edited by the user on the database. Here is the php code to do it.

savecustomer.php

<?php
include_once "dbconnect.php";

$sql = "update customers set " . $_POST["column"] . "='" . $_POST["value"] . "' where id=" . $_POST["id"];
if (mysqli_query($con, $sql))
    echo "true";
else
    echo "false";
?>

Done! Now we have all the necessary files in place. Run index.php and you will see a nice table that lists the records from the database. Edit some table cells and the cell color will change to red during editing.

php mysql inline editing ajax

Once you finish editing, the table cell turns green as soon as it lost focus.

inline editing php mysql jquery ajax

Refresh the page and the data you have modified will remain there. It means that we have saved the edited data on the database successfully.

Read Also:

That explains about inline editing using php, mysql and ajax. Inline editing will enhance user experience and also save you from creating multiple web forms. You can apply the technique with any html element. I hope you like this tutorial. Please don't forget to share it on social media. Good day!!!

Drag and Drop jQuery Multiple File Upload using AJAX PHP with Progress Bar

On 11/28/2017 4 Comments so far

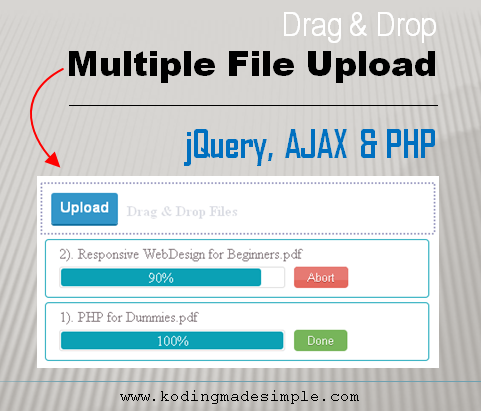
Hi, we'll see how to upload multiple files using jQuery, AJAX and PHP in this tutorial. To upload multiple file in php we are going to use an awesome jquery file upload plug-in from hayageek.com. It is a drag and drop file upload plug-in that supports multiple file uploads at once along with progress bars. In HTML 5 drag and drop is part of the standard and it comes with inbuilt drag and drop api to support drag and drop feature in web projects.

drag and drop jquery multiple file upload ajax php

This file upload plug-in creates an ajax form on go to upload files and comes with various options for us to customize the way it behaves like showing progress bar, cancelling upload in the middle, auto form submission, restrict the number of files and types of files to upload etc. It depends on Ajax Form Plug-in to automatically generate ajax form for uploading files without page refresh.

You can either drag and drop the files in the form or select them with the upload button.

Implementing jQuery Multiple File Upload with Progress Bar

First download the file upload plug-in and extract its contents to your working folder. Then create a folder named 'uploads' to hold all the uploaded files.

Next create a HTML file 'index.html' which serves as an interface to upload files.

1. Load the required css and javascript files. Since it is built over jquery library we have to include jquery before the other js file.

<link href="/path/to/uploadfile.min.css" rel="stylesheet">
<script src="/path/to/jquery-1.10.2.js"></script>
<script src="/path/to/jquery.uploadfile.min.js"></script>

2. Next create a <div> block with an id 'multiple_file_uploader' which acts as a placeholder for the ajax form.

<div id="multiple_file_uploader">Upload</div>

3. Next add the java script code to initialize the plug in and create ajax form in the place of <div> block to upload files.

$(document).ready(function()
{
    $("#multiple_file_uploader").uploadFile({
        fileName : "myfile",
        url : "upload.php",
        multiple : true,
        maxFileCount : 5,
        allowedTypes : "jpg,png,gif",
        showProgress : true
    });
});

When you open the html file in the browser you will get a file upload form with upload button like this.

jquery multiple file upload ajax form example
File Upload AJAX Form

The uploadFile() API creates ajax form and uploads the files to server. This method takes up various options as parameters to customize its behavior.

Upload File Options
  • fileName - Name of the file input.
  • url - PHP file name that should be executed when the form is submitted.
  • multiple - Set as true for multiple file uploading.
  • maxFileCount - The maximum number of files allowed to be uploaded at a time.
  • showProgress - Set as true to show the ongoing progress bar.
  • allowedTypes - Comma (,) separated file extensions that are allowed to be uploaded. For example if you want to allow only text or pdf files use it like "txt,pdf".

Here is the complete code for the 'index.html' file.

index.html

<!DOCTYPE html>
<html>
    <head>
        <title>Drag and Drop Multiple File Upload | PHP Ajax and jQuery</title>
        <link href="/path/to/uploadfile.min.css" rel="stylesheet">
        <script src="/path/to/jquery-1.10.2.js"></script>
        <script src="/path/to/jquery.uploadfile.min.js"></script>
    </head>
    <body>
        <div id="multiple_file_uploader">Upload</div>
        <script>
        $(document).ready(function() {
            $("#multiple_file_uploader").uploadFile({
                fileName : "myfile",
                url : "upload.php",
                multiple : true,
                maxFileCount : 5,
                allowedTypes : "jpg,png,gif",
                showProgress : true
            });
        });
        </script>
    </body>
</html>

PHP Script to Upload Multiple Files

Next we have to create the php file 'upload.php' which we have passed using the 'url' parameter. Once the file uploading ajax form is submitted, this php script will be executed where the actual file uploading process takes place.

upload.php

<?php
// set folder to upload files
$output_dir = "uploads/";

if(isset($_FILES["myfile"]))
{
    $ret = array();

    $error = $_FILES["myfile"]["error"];

    // upload single file
    if(!is_array($_FILES["myfile"]["name"])) //single file
    {
        $fileName = $_FILES["myfile"]["name"];
        move_uploaded_file($_FILES["myfile"]["tmp_name"],$output_dir.$fileName);
        $ret[]= $fileName;
    }
    else
    {
        // Handle Multiple files
        $fileCount = count($_FILES["myfile"]["name"]);
        for($i=0; $i      $fileCount; $i++)
        {
            $fileName = $_FILES["myfile"]["name"][$i];
            move_uploaded_file($_FILES["myfile"]["tmp_name"][$i],$output_dir.$fileName);
            $ret[]= $fileName;
        }
    }
    // output file names as comma seperated strings to display status
    echo json_encode($ret);
}
?>

The $_FILES["myfile"]["error"] will return error messages if there is any and displayed below the file upload form like this.

php mulitple file upload error message

Read this article to learn how file upload process works in php.

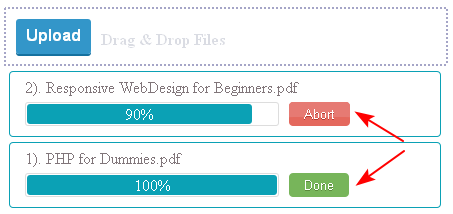
All the selected files will be uploaded to the 'uploads' directory. And progress bars will be shown at the bottom of the forms for each file along with an 'Abort' button. Once the uploading process is completed it shows 'Done' button at the end of the progress bar. This is a very user friendly feature available in this plug-in.

ajax jquery multiple file upload progress bar
File Upload Progress Bar with Abort and Done Buttons

If you don't want the abort and done buttons to show in the progress bar, then set them to false like this,

showAbort : false
showDone : false
Read:

That was all about drag and drop multiple file uploading process using jquery, ajax and php. I hope you like this tutorial. Please don't forget to share it on your social circle.

PHP Search Engine Script for MySQL Database using AJAX

On 11/27/2017 6 Comments so far

Hi this time I have come up with an interesting topic - Creating PHP Search Engine Script for MySQL Database. We are going to employ AJAX technology to send the HTTP request to the web service and show up instant suggestions while the user type in the search box which is quite similar to Google instant search. Accessing database server through AJAX and maintaining minimal server load is a real challenge to face.

If you think creating search engine scripts are complex and will have several hundreds of lines of code, then you are going to be surprised. Just with few lines of code, we can bring up a fully workable search engine solution in php. I’ll try to keep the process as simple as possible for any newbie to follow easily.

php mysql search engine script

Twitter Typeahead JavaScript Library

I’m going to use twitter’s typeahead js library which will take care of all ajax communications to the web server. This is a clean and neat plug-in explicitly designed for this sort of purpose. Go here and here and download typeahead.js and jquery library, extract and move the files to your root folder.

Designing the MySQL Database for PHP Search Engine

Next we need to build a proper database with some dummy data to use as an example. Run this sql command to create a library database with some data.

CREATE DATABASE `library`;
USE `library`;

CREATE TABLE IF NOT EXISTS `books` (
  `id` int(10) NOT NULL AUTO_INCREMENT,
  `title` varchar(100) NOT NULL,
  `author` varchar(30) NOT NULL,
  `isbn` varchar(30) NOT NULL,
  PRIMARY KEY (`id`)
) ENGINE=MyISAM  DEFAULT CHARSET=latin1 AUTO_INCREMENT=6;

INSERT INTO `tbl_books` (`id`, `title`, `author`, `isbn`) VALUES
(1, 'Learning PHP, MySQL & JavaScript', 'Robin Nixon', 'ISBN-13: 978-1491918661'),
(2, 'PHP and MySQL for Dynamic Web Sites', 'Larry Ullman', 'ISBN-13: 978-0321784070'),
(3, 'PHP Cookbook', 'David Sklar', 'ISBN-13: 978-1449363758'),
(4, 'Programming PHP', 'Kevin Tatroe', 'ISBN-13: 978-1449392772'),
(5, 'Modern PHP: New Features and Good Practices', 'Josh Lockhart', 'ISBN-13: 978-1491905012');

Having the required libraries and sample database in place, let's move on to the coding part.

Creating PHP Search Engine Script for MySQL Database

We need to create two files here. One thing is the frontend index.html - this act as the user interface which contains a search box and allows the user to search for the books by their title. The second one is the backend php script search.php which accesses the mysql database and returns the book titles that matches the search string. The response to the HTTP GET request will be in JSON and it will be shown under the search box like Google instant suggestion.

index.html
<html>
<head>
    <title>AJAX PHP Search Engine Script for MySQL Database</title>
    <style type="text/css">
    .se-example    {
        font-family: sans-serif;
        position: relative;
        margin: 100px;
    }
    .typeahead {
        background-color: #FFFFFF;
    }
    .typeahead:focus {
        border: 1px solid #999999;
    }
    .tt-query {
        box-shadow: 0 1px 1px rgba(0, 0, 0, 0.075) inset;
    }
    .tt-hint {
        color: #999999;
    }
    .typeahead, .tt-query, .tt-hint {
        border: 1px solid #CCCCCC;
        border-radius: 4px;
        font-size: 16px;
        height: 38px;
        line-height: 30px;
        outline: medium none;
        padding: 8px 12px;
        width: 396px;
    }
    .tt-dropdown-menu {
        background-color: #FFFFFF;
        border: 1px solid rgba(0, 0, 0, 0.2);
        border-radius: 4px;
        box-shadow: 0 5px 10px rgba(0, 0, 0, 0.2);
        margin-top: 12px;
        padding: 8px 0;
        width: 422px;
    }
    .tt-suggestion {
        font-size: 16px;
        line-height: 24px;
        padding: 3px 20px;
    }
    .tt-suggestion p {
        margin: 0;
    }
    .tt-suggestion.tt-is-under-cursor {
        background-color: #999999;
        color: #FFFFFF;
    }
    </style>
</head>
<body>
    <div class="se-example">
        <input id="searchbox" type="text" class="typeahead tt-query" autocomplete="off" spellcheck="false" placeholder="Search for Book Name..."/>
    </div>

    <script src="js/jquery-1.10.2.js"></script>
    <script src="js/typeahead.js"></script>
    <script>
    $(document).ready(function(){
        $('#searchbox').typeahead({
            remote:'search.php?st=%QUERY',
            limit : 5
        });
    });
    </script>
</body>
</html>

The method typeahead() will turn any textbox into an instant search box and we pass only two options to the function.

The remote option will send the GET Request (AJAX call) to the search.php script with the search string as the query parameter. %QUERY will contain the user search string.

The limit option will limit the maximum number of suggestions pops up below the search box. Here it will suggest 5 book titles at the most.

Also note that it is important to set autocomplete="off" for the input - this will turn off browser’s auto complete option and keep this from messing up with our search engine suggestions.

The next thing is to create the php search engine script for mysql database. This php script will search for all the book titles containing the given query string and return it in the form of json.

search.php
<?php
$str = $_GET['st'];
$connection = mysqli_connect("localhost", "username", "password", "library");
$sql = "select title from books where title LIKE '%{$str}%'";
$result = mysqli_query($connection, $sql);

$array = array();
while($row = mysqli_fetch_assoc($result)) {
    $array[] = $row['title'];
}
echo json_encode($array);
?>

Here we convert the mysql resultset to json with the help of the function json_encode() and return it to the front-end.

That’s it! We have created a simple and efficient AJAX & PHP search engine. Now run index.html file in the browser and you can see a search box like this,

ajax php instant search box for mysql
PHP AJAX Search Engine

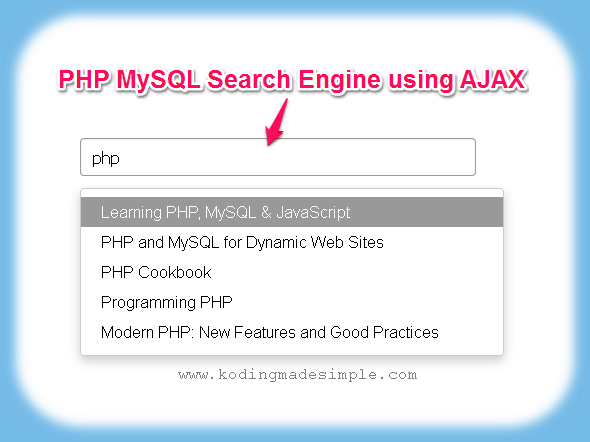
Type something inside the box and you will be shown up with instant suggestions.

ajax php search engine for mysql database

You can increase or decrease the typeahead limit option to display more or less suggestions at the bottom.

Also Read:

That was all about building AJAX PHP Search Engine Script for MySQL Database. I hope this will be useful to you. Let me know your queries through comments.

CodeIgniter MODAL Contact Form w/ jQuery AJAX Validation Example

On 11/26/2017 18 Comments so far

Hi, a while back I have written a tutorial about building contact form in codeigniter. It got great feedbacks and some of the readers asked about implementing the same feature in modal popup form. I thought it would be beneficial to kodingmadesimple.com readers if I provide it as a separate tutorial and in this article I’m going to show you How to Build a Proper Modal Contact Form in CodeIgniter with AJAX Field Validations.

Though the features of the modal form we are going to build would be similar to regular contact form, it become little bit tricky in the way we do form field validations. Since we can’t afford to refresh the page by submitting the form, we should go by AJAX technique to avoid page refreshing.

One thing to mention here is I wish to validate the form input on server side for security reasons even though you can do it on client side. Let’s see how to implement this in codeigniter.

Creating Modal Form using Twitter Bootstrap CSS

To build our modal form, we are going to use Twitter Bootstrap CSS since it provides easy-to-use modal component and it fits our purpose. In order to use bootstrap in codeigniter you have to properly integrate the two frameworks. It’s very simple to do it and if you don’t know how, read this article to setup bootstrap css in codeigniter framework.

Recommended Read: How to Get User IP Address in CodeIgniter

CodeIgniter Modal Contact Form Workflow

Modal Form is just like any other web forms but it opens up as a popover, so it should be invoked by clicking a button or a link. For better understanding I’ll show this with an example page, consisting a top navigation menu with ‘Contact’ menu link and upon clicking the contact menu the modal contact form should pop up.

Then using the ajax technique we should post the form data, run validation check and display if there are any validation errors at the bottom of the form. If it passes validation check, we should configure and send email to the site owner’s email address and provide proper message alerts to the user.

Implementing Modal Contact Form in CodeIgniter

To implement the modal form we should create a controller and a view file (for interface) in codeigniter. Since we are going to process the form data and send it as email there is no need for model file.

The Controller File (‘modal_contact.php’)

First create a file named ‘modal_contact.php’ inside ‘application/controllers’ folder and copy paste the below code to it.

<?php
class modal_contact extends CI_Controller
{
    public function __construct()
    {
        parent::__construct();
        $this->load->helper(array('form','url'));
        $this->load->library(array('form_validation', 'email'));
    }

    function index()
    {
        $this->load->view('modal_contact_view');
    }

    function submit()
    {
        //set validation rules
        $this->form_validation->set_rules('name', 'Name', 'trim|required|xss_clean|callback_alpha_space_only');
        $this->form_validation->set_rules('email', 'Emaid ID', 'trim|required|valid_email');
        $this->form_validation->set_rules('subject', 'Subject', 'trim|required|xss_clean');
        $this->form_validation->set_rules('message', 'Message', 'trim|required|xss_clean');
        
        //run validation check
        if ($this->form_validation->run() == FALSE)
        {   //validation fails
            echo validation_errors();
        }
        else
        {
            //get the form data
            $name = $this->input->post('name');
            $from_email = $this->input->post('email');
            $subject = $this->input->post('subject');
            $message = $this->input->post('message');
            
            //set to_email id to which you want to receive mails
            $to_email = 'user@gmail.com';
            
            //configure email settings
            $config['protocol'] = 'smtp';
            $config['smtp_host'] = 'ssl://smtp.gmail.com'; // change this to yours
            $config['smtp_port'] = '465';
            $config['smtp_user'] = 'user@gmail.com'; // change this to yours
            $config['smtp_pass'] = 'mypassword'; // change this to yours
            $config['mailtype'] = 'html';
            $config['charset'] = 'iso-8859-1';
            $config['wordwrap'] = TRUE;
            $config['newline'] = "\r\n"; //use double quotes
            $this->email->initialize($config);
            
            //send mail
            $this->email->from($from_email, $name);
            $this->email->to($to_email);
            $this->email->subject($subject);
            $this->email->message($message);
            if ($this->email->send())
            {
                // mail sent
                echo "YES";
            }
            else
            {
                //error
                echo "NO";
            }
        }
    }
    
    //custom validation function to accept alphabets and space
    function alpha_space_only($str)
    {
        if (!preg_match("/^[a-zA-Z ]+$/",$str))
        {
            $this->form_validation->set_message('alpha_space_only', 'The %s field must contain only alphabets and space');
            return FALSE;
        }
        else
        {
            return TRUE;
        }
    }
}
?>

The constructor function loads the essential helper & libraries including the ‘email’ class for sending mail.

The index() function is the default one to be called when we invoke the controller and it loads the view file (this we will create next) to show the form interface.

The submit() function is where the form data is posted through ajax call, run validation check and send email.

Here we set the validation rules for all the form fields and run validation check. If there is any validation error then we display it at the bottom of the form. The statement echo validation_errors(); will return back all the validation error messages. This in turn will be received by the jquery ajax function and displayed at the bottom of the modal form interface like this.

codeigniter-ajax-form-validation-example
CodeIgniter AJAX Form Validation Errors

If there is no such validation errors, then we configure the email settings and send the mail using $this->email->send(); statement. We also notify the user if their message is properly sent or not.

The View File (‘modal_contact_view.php’)

Now it’s time to create the modal interface. Create a file named ‘modal_contact_view.php’ inside ‘application/views’ folder and copy paste the below code and save.

<!DOCTYPE html>
<html>
<head>
    <meta charset="utf-8">
    <meta name="viewport" content="width=device-width, initial-scale=1.0">
    <title>CodeIgniter Modal Contact Form Example</title>
    <!--load bootstrap css-->
    <link href="<?php echo base_url("assets/bootstrap/css/bootstrap.css"); ?>" rel="stylesheet" type="text/css" />
</head>
<body>
<!-- Navigation Menu -->
<nav class="navbar navbar-inverse" role="navigation">
    <div class="container-fluid">
        <div class="navbar-header">
            <button type="button" class="navbar-toggle" data-toggle="collapse" data-target="#navbar1">
                <span class="sr-only">Toggle navigation</span>
                <span class="icon-bar"></span>
                <span class="icon-bar"></span>
                <span class="icon-bar"></span>
            </button>
            <a class="navbar-brand" href="#">ShopMania</a>
        </div>
        <div class="collapse navbar-collapse" id="navbar1">
            <ul class="nav navbar-nav">
                <li><a href="#">Home</a></li>
                <li><a href="#">About</a></li>
                <li><a href="#">Deals & Offers</a></li>
                <li><a href="#">Blog</a></li>
                <li class="active"><a href="#" data-toggle="modal" data-target="#myModal">Contact</a></li>
            </ul>
        </div>
    </div>
</nav>

<!-- modal form -->
<div id="myModal" class="modal fade" aria-labelledby="myModalLabel" aria-hidden="true" tabindex="-1" role="dialog">
    <div class="modal-dialog">
        <div class="modal-content">
            <?php $attributes = array("name" => "contact_form", "id" => "contact_form");
            echo form_open("modal_contact/submit", $attributes);?>

            <div class="modal-header">
                <button type="button" class="close" data-dismiss="modal" aria-hidden="true">×</button>
                <h4 class="modal-title">Contact Form</h4>
            </div>
            <div class="modal-body" id="myModalBody">
                <div class="form-group">
                    <label for="name">Name</label>
                    <input class="form-control" id="name" name="name" placeholder="Your Full Name" type="text" value="<?php echo set_value('name'); ?>" />
                </div>
                
                <div class="form-group">
                    <label for="email">Email ID</label>
                    <input class="form-control" id="email" name="email" placeholder="Email-ID" type="text" value="<?php echo set_value('email'); ?>" />
                </div>

                <div class="form-group">
                    <label for="subject">Subject</label>
                    <input class="form-control" id="subject" name="subject" placeholder="Subject" type="text" value="<?php echo set_value('subject'); ?>" />
                </div>

                <div class="form-group">
                    <label for="message">Message</label>
                    <textarea class="form-control" id="message" name="message" rows="4" placeholder="Message"><?php echo set_value('message'); ?></textarea>
                </div>

                <div id="alert-msg"></div>
            </div>
            <div class="modal-footer">
                <input class="btn btn-default" id="submit" name="submit" type="button" value="Send Mail" />
                <input class="btn btn-default" type="button" data-dismiss="modal" value="Close" />
            </div>
            <?php echo form_close(); ?>            
        </div>
    </div>
</div>
<!--load jquery & bootstrap js files-->
<script type="text/javascript" src="<?php echo base_url("assets/js/jquery-1.10.2.js"); ?>"></script>
<script src="<?php echo base_url("assets/bootstrap/js/bootstrap.min.js"); ?>"></script>
<script type="text/javascript">
$('#submit').click(function() {
    var form_data = {
        name: $('#name').val(),
        email: $('#email').val(),
        subject: $('#subject').val(),
        message: $('#message').val()
    };
    $.ajax({
        url: "<?php echo site_url('modal_contact/submit'); ?>",
        type: 'POST',
        data: form_data,
        success: function(msg) {
            if (msg == 'YES')
                $('#alert-msg').html('<div class="alert alert-success text-center">Your mail has been sent successfully!</div>');
            else if (msg == 'NO')
                $('#alert-msg').html('<div class="alert alert-danger text-center">Error in sending your message! Please try again later.</div>');
            else
                $('#alert-msg').html('<div class="alert alert-danger">' + msg + '</div>');
        }
    });
    return false;
});
</script>
</body>
</html>

The <nav> element creates responsive navigation menu using bootstrap’s navbar component. Next we have created the modal form with id #myModal and invoke it using the data attribute data-target="#myModal" when the user clicks on the ‘contact’ menu.

At the bottom of the markup we have created a jQuery script to run when the user clicks on the ‘Send Mail’ button and it collects the form data and post it to the controller’s submit() function. The return value is received and the appropriate message alerts are displayed on the div block with id #alert-msg.

That’s it. We have completed the coding part. Now run the controller in the browser and you can see a page with navigation menu like this.

twitter-bootstrap-navigation-menu-example

Next click on the ‘Contact’ menu link and the modal form pops up like this.

codeigniter-modal-contact-form-ajax-validation-example
CodeIgniter Modal Contact Form

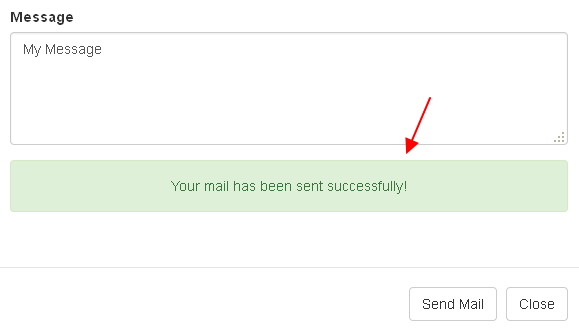
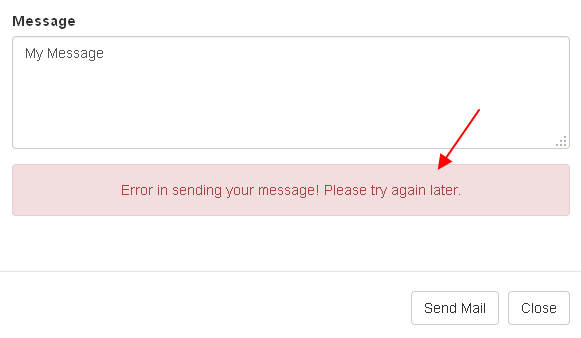
When you feed the form data and click on the ‘Send Mail’ button, the form data is submitted and processed via AJAX call and appropriate success or failure alerts will be displayed like this.

codeigniter-send-email-success-message
codeigniter-send-email-failure-message
Also Read:

Now we have created a working modal contact form in php codeigniter framework. If you want to store the contact form data into database rather than sending mail, then read this codeigniter contact form tutorial with database storage option.

Simple AJAX Pagination in jQuery, PHP PDO & MySQL

On 1/02/2017 2 Comments so far

Hi! Happy New Year 2017!!!

This is my first post in the new year and let's see how to create simple ajax pagination in php pdo, mysql and jquery. Pagination script adds on for user experience by allowing users to skim through data across multiple pages instead of endless scrolling. But while implementing pagination in php certain things has to be taken care of.

For the matter, the process may get complicated with too many lines of code when not using external libraries or plugins. And refreshing the page every time user clicks on a page link is not going to look pleasant. You'll definitely need to be using AJAX.

So to simplify the process I'm going to use a jQuery plugin called Bootpag which is light-weight and handles ajax request at the background effortlessly. The plug-in rely on bootstrap framework.

Below I have shared a simple php pagination script. It fetch and display mysql record in a html table and split the records over multiple pages with pagination links at the bottom for navigation.

Read:

Create MySQL Database & Table:

Here are the sql commands to create required database and table. Run them in mysql interface to create db & table.

CREATE DATABASE IF NOT EXISTS `kms_demo`;

USE `kms_demo`;

CREATE TABLE IF NOT EXISTS `customers` (
  `id` int(8) NOT NULL AUTO_INCREMENT,
  `name` varchar(50) NOT NULL,
  `email` varchar(60) NOT NULL,
  `city` varchar(50) NOT NULL,
  PRIMARY KEY (`id`)
) ENGINE=MyISAM  DEFAULT CHARSET=latin1 AUTO_INCREMENT=14;

INSERT INTO `customers` (`id`, `name`, `email`, `city`) VALUES
(1, 'Jim Connor', 'jimconnor@yahoo.com', 'Las Vegas'),
(2, 'Taylor Fox', 'taylorfox@hotmail.com', 'San Francisco'),
(3, 'Daniel Greyson', 'danielgreyson@hotmail.com', 'New York'),
(4, 'Julia Brown', 'juliabrown@gmail.com', 'Los Angeles'),
(5, 'Rose Harris', 'roseharris@gmail.com', 'New York'),
(6, 'Lilly Whites', 'lillywhites@outlook.com', 'New York'),
(7, 'Jennifer Winters', 'jennie.winters001@gmail.com', 'Miami'),
(8, 'Michael Bruce', 'michaelbruce78@yahoo.com', 'Los Angeles'),
(9, 'John Alex', 'johnalex@example.com', 'Chicago'),
(10, 'Demi Milan', 'demimilan@gmail.com', 'Austin'),
(11, 'Austin Joseph', 'austin.joseph.boston@gmail.com', 'Boston'),
(12, 'Mark Higgins', 'mark.higgins21@yahoo.com', 'Houston'),
(13, 'Sean Kennedy', 'seankennedy.boss@outlook.com', 'Seattle');

Simple AJAX Pagination using jQuery & PHP PDO

First make sure you have all the below library files in place and then move on to coding part.

root
|__css
|    |___ bootstrap.min.css
|
|__js
    |___ bootstrap.min.js
    |___ jquery-1.10.2.js
    |___ jquery.bootpag.min.js

db_connect.php

This is the database configuration file. Here's where you define connection details to mysql and more importantly the number of records visible per page. Also I have used PDO library instead of mysqli to connect php to mysql database.

<?php
$hostname = "localhost";
$username = "username"; // change to yours
$password = "password"; // change to yours
$database = "kms_demo";
$row_limit = 5;

// connect to mysql
try {
    $pdo = new PDO("mysql:host=$hostname;dbname=$database", $username, $password);
    $pdo->setAttribute(PDO::ATTR_ERRMODE, PDO::ERRMODE_EXCEPTION);
} catch (PDOException $err) {
    die("Error! " . $err->getMessage());
}
?>

The variable $row_limit defines number of records to be displayed per page. Just change this limit according to your need.

index.php

It is the main file to show records from mysql db as html table along with pagination links at the bottom. The database records are split into several pages and displayed one page at a time. In order to generate pagination links we need to calculate the number of pages. You have to just divide the total number of records by rows per page.

<?php
include_once("db_connect.php");

$stmt = $pdo->prepare("SELECT COUNT(*) FROM customers");
$stmt->execute();
$rows = $stmt->fetch();

// get total no. of pages
$total_pages = ceil($rows[0]/$row_limit);
?>

<!DOCTYPE html>
<html lang="en">
<head>
    <title>AJAX Pagination using PHP & MySQL</title>
    <meta name="viewport" content="width=device-width, initial-scale=1.0">
    <link href="css/bootstrap.min.css" rel="stylesheet" type="text/css" />
    <style type="text/css">
    .panel-footer {
        padding: 0;
        background: none;
    }
    </style>
</head>
<body>
<br/>
<div class="container">
    <div class="panel panel-default">
        <div class="panel-heading text-center"><h3>jQuery PHP Pagination Demo</h3></div>

        <table class="table table-bordered table-hover">
            <thead>
                <tr>
                    <th>#</th>
                    <th>Name</th>
                    <th>Email ID</th>
                    <th>Location</th>
                </tr>
            </thead>
            <tbody id="pg-results">
            </tbody>
        </table>
        <div class="panel-footer text-center">
            <div class="pagination"></div>
        </div>
    </div>
</div>
    
<script src="js/jquery-1.10.2.js" type="text/javascript"></script>
<script src="js/bootstrap.min.js" type="text/javascript"></script>
<script src="js/jquery.bootpag.min.js" type="text/javascript"></script>

<script type="text/javascript">
$(document).ready(function() {
    $("#pg-results").load("fetch_data.php");
    $(".pagination").bootpag({
        total: <?php echo $total_pages; ?>,
        page: 1,
        maxVisible: 5
    }).on("page", function(e, page_num){
        e.preventDefault();
        /*$("#results").prepend('<div class="loading-indication"><img src="ajax-loader.gif" /> Loading...</div>');*/
        $("#pg-results").load("fetch_data.php", {"page": page_num});
    });
});
</script>

</body>
</html>

Do you notice that we haven't used any ajax() function in our script? Here's where the bootpag plugin comes into play. It takes care of ajax call at the background. All you have to do is, use the plugin's load() method to load the page results and bootpag() method to display pagination links and the rest of the things will be taken care automatically.

fetch_data.php

This script will be executed during ajax request. It pulls of the records from the database by using LIMIT Query and returns only a small set of rows to be displayed on a particular page.

<?php
include_once("db_connect.php");

if (isset($_POST["page"])) {
    $page_no = filter_var($_POST["page"], FILTER_SANITIZE_NUMBER_INT, FILTER_FLAG_STRIP_HIGH);
    if(!is_numeric($page_no))
        die("Error fetching data! Invalid page number!!!");
} else {
    $page_no = 1;
}

// get record starting position
$start = (($page_no-1) * $row_limit);

$results = $pdo->prepare("SELECT * FROM customers ORDER BY id LIMIT $start, $row_limit");
$results->execute();

while($row = $results->fetch(PDO::FETCH_ASSOC)) {
    echo "<tr>" . 
    "<td>" . $row['id'] . "</td>" . 
    "<td>" . $row['name'] . "</td>" . 
    "<td>" . $row['email'] . "</td>" . 
    "<td>" . $row['city'] . "</td>" . 
    "</tr>";
}
?>

That's it! Now we have the complete set of coding for ajax driven pagination using php & mysql. Run index.php and you can see the records displayed on html table with pagination links.

ajax-pagination-in-php-mysql-jquery

Initially it will show you the results for the first page and you have to click on the page links to navigate to other pages.

simple-pagination-bootstrap-jquery-php-pdo
Also Read:

I hope you find this simple ajax pagination script with jquery, php pdo & mysql useful. The code is highly customizable and you have all the required things in place. If you have any queries then please let me know through comments.

Country State City Dropdown List using jQuery, Ajax & PHP

On 12/19/2016 10 Comments so far

Hi! Today we'll see how to create country state city drop down list using jquery, ajax, php & mysql. Sometime back I shared a tutorial on building dynamic dependent select box using ajax and codeigniter. And I got enquiries from readers about implementing similar thing with php. So I thought it would be better to write separate tutorial about creating dynamic dependent select box in php without the complex MVC structure.

Though the underlying concept would be same, implementing dynamic dropdown list in core php is way different from than in MVC like Codeigniter. I'm going to take the same country state city dropdown list example and explain the process here.

Dynamic Country State City Dropdown List using jQuery, Ajax and PHP:

The process goes like this. We have three drop down lists on a php form each one for 'country', 'state' & 'city' respectively. On page load 'country' dropdown alone will be populated with country names from mysql db. On choosing a country, the 'state' dropdown will be filled with state names based on country. Similarly selecting a state will populate relative city names in the 'city' dropdown box.

The entire process will be handled via ajax call without refreshing the page.

Don't Miss: AJAX Modal Login Form using PHP OOP, MySQL & jQuery

Create MySQL Database & tables:

CREATE DATABASE IF NOT EXISTS `db_demo`;

USE `db_demo`;

CREATE TABLE IF NOT EXISTS `country` (
  `country_id` int(9) NOT NULL AUTO_INCREMENT,
  `country_name` varchar(30) NOT NULL,
  PRIMARY KEY (`country_id`)
) ENGINE=MyISAM  DEFAULT CHARSET=latin1 AUTO_INCREMENT=6;

INSERT INTO `country` (`country_id`, `country_name`) VALUES
(1, 'Canada'), (2, 'China'), (3, 'India'), (4, 'United Kingdom'), (5, 'United States');

CREATE TABLE IF NOT EXISTS `state` (
  `state_id` int(9) NOT NULL AUTO_INCREMENT,
  `country_id` int(9) NOT NULL,
  `state_name` varchar(30) NOT NULL,
  PRIMARY KEY (`state_id`)
) ENGINE=MyISAM  DEFAULT CHARSET=latin1 AUTO_INCREMENT=10;

INSERT INTO `state` (`state_id`, `country_id`, `state_name`) VALUES
(1, 3, 'Bihar'), (2, 3, 'Delhi'), (3, 3, 'Maharashtra'), (4, 3, 'Tamil Nadu'), (5, 3, 'West Bengal'), (6, 1, 'Newfoundland'), (7, 2, 'Shanghai'), (8, 4, 'England'), (9, 5, 'Florida');

CREATE TABLE IF NOT EXISTS `city` (
  `city_id` int(9) NOT NULL AUTO_INCREMENT,
  `state_id` int(9) NOT NULL,
  `city_name` varchar(30) NOT NULL,
  PRIMARY KEY (`city_id`)
) ENGINE=MyISAM  DEFAULT CHARSET=latin1 AUTO_INCREMENT=10;

INSERT INTO `city` (`city_id`, `state_id`, `city_name`) VALUES
(1, 3, 'Kalyan'), (2, 3, 'Mumbai'), (3, 3, 'Nagpur'), (4, 3, 'Pune'), (5, 3, 'Thane'), (6, 6, 'St Johns'), (7, 7, 'Shanghai'), (8, 8, 'London'), (9, 9, 'Miami');

db_connect.php

This file handles database connectivity from php server. Here I have used PDO & prepared statements for database communication as it's more secure and portable.

<?php
// mysql connection
$hostname = "localhost";
$username = "root";
$password = "";
$database = "db_demo";

try {
    $pdo = new PDO("mysql:host=$hostname;dbname=$database", $username, $password);
    $pdo->setAttribute(PDO::ATTR_ERRMODE, PDO::ERRMODE_EXCEPTION);
} catch (PDOException $e) {
    die("Error! " . $e->getMessage());
}
?>

index.php

This is the main file for our demo containing the user interface. It consists of an html form with three drop downs. And the ajax script is kept in a separate JavaScript file called 'script.js' and loaded at the end of index file.

<?php
include_once("db_connect.php");

// fetch country details
$stmt = $pdo->prepare("SELECT * FROM country ORDER BY country_name ASC");
$stmt->execute();
?>

<!DOCTYPE html>
<html>
<head>
    <title>Dynamic Dependent Select Box using PHP & AJAX</title>
    <meta content="width=device-width, initial-scale=1.0" name="viewport" />
    <link href="https://maxcdn.bootstrapcdn.com/bootstrap/3.3.7/css/bootstrap.min.css" type="text/css" rel="stylesheet" />
</head>
<body>
<div class="container" style="margin-top: 30px;">
<div class="col-md-6 col-md-offset-3">
    <div class="panel panel-default">
        <div class="panel-body">
            <h2 class="text-center">Dynamic Dropdown Demo</h2><br/>
            <form id="demo-form">
            <div class="form-group">
                <select id="country" class="form-control input-lg">
                    <option value="">Select Country</option>
                    <?php while($row = $stmt->fetch(PDO::FETCH_ASSOC)) { ?>
                    <option value="<?php echo $row['country_id']; ?>"><?php echo $row['country_name']; ?></option>
                    <?php } ?>
                </select>
            </div>
            <div class="form-group">
                <select id="state" class="form-control input-lg">
                     <option value="">Select State</option>
                </select>
            </div>
            <div class="form-group">
                <select id="city" class="form-control input-lg">
                     <option value="">Select City</option>
                </select>
            </div>
            <div class="form-group">
                <input id="submit" value="Submit" type="submit" class="btn btn-lg btn-danger" />
            </div>
            </form>
        </div>
    </div>
</div>
</div>

<script src="https://ajax.googleapis.com/ajax/libs/jquery/1.10.2/jquery.min.js"></script>
<script src="https://maxcdn.bootstrapcdn.com/bootstrap/3.3.7/js/bootstrap.min.js"></script>
<script src="js/script.js"></script>
</body>
</html>

populate_data.php

This is the server script that communicates with mysql db and populates dropdowns with data. This file is called through ajax() function. It retrieves state and city details from database based on the chosen 'country_id' and 'state_id' resp. and returns them to ajax call which in turn populates the drop down lists.

<?php
include_once('db_connect.php');

if(isset($_POST['cid'])) {
    // fetch state details
    $stmt = $pdo->prepare("SELECT * FROM state WHERE country_id=:cid ORDER BY state_name ASC");
    $stmt->execute(array(':cid' => $_POST['cid']));
    echo '<option value="0">Select State</option>';
    while($row = $stmt->fetch(PDO::FETCH_ASSOC)) {
        echo '<option value="' . $row['state_id'] . '">' . $row['state_name'] . '</option>';
    }
}

if(isset($_POST['sid'])) {
    // fetch city details
    $stmt = $pdo->prepare("SELECT * FROM city WHERE state_id=:sid ORDER BY city_name ASC");
    $stmt->execute(array(':sid' => $_POST['sid']));
    echo '<option value="0">Select City</option>';
    while($row = $stmt->fetch(PDO::FETCH_ASSOC)) {
        echo '<option value="' . $row['city_id'] . '">' . $row['city_name'] . '</option>';
    }
}
?>

script.js

Finally the javascript file. It contains the jquery ajax functions that are triggered when country or state name is chosen.

$('document').ready(function() {
    $('#country').change(function(){
        var country_id = $(this).val();
        $("#state > option").remove();
        $.ajax({
            type: "POST",
            url: "populate_data.php",
            data: "cid=" + country_id,
            success:function(opt){
                $('#state').html(opt);
                $('#city').html('<option value="0">Select City</option>');
            }
        });
    });

    $('#state').change(function(){
        var state_id = $(this).val();
        $("#city > option").remove();
        $.ajax({
            type: "POST",
            url: "populate_data.php",
            data: "sid=" + state_id,
            success:function(opt){
                $('#city').html(opt);
            }
        });
    });
});

Done! We have the required database and coding files in place. Now run index.php and you can see a form populated with country dropdown.

country-state-city-drop-down-list-jquery-ajax-php

Now choose a country to load corresponding states in the state drop down via ajax. And a state to load respective cities in the city dropdown list.

php-mysql-country-state-city-dropdown-list

And you can see the entire process happening in a discreet way without page refresh thanks to Ajax.

Also Read: Insert, Read, Update & Delete CRUD in PHP and MySQLi

That explains about creating country state city dropdown list in php & ajax. Please let me know if you have any queries through comments.

Contact Form

Name

Email *

Message *